Photo EXIF Editor Guide, Episode 6: Templates and Copy EXIF
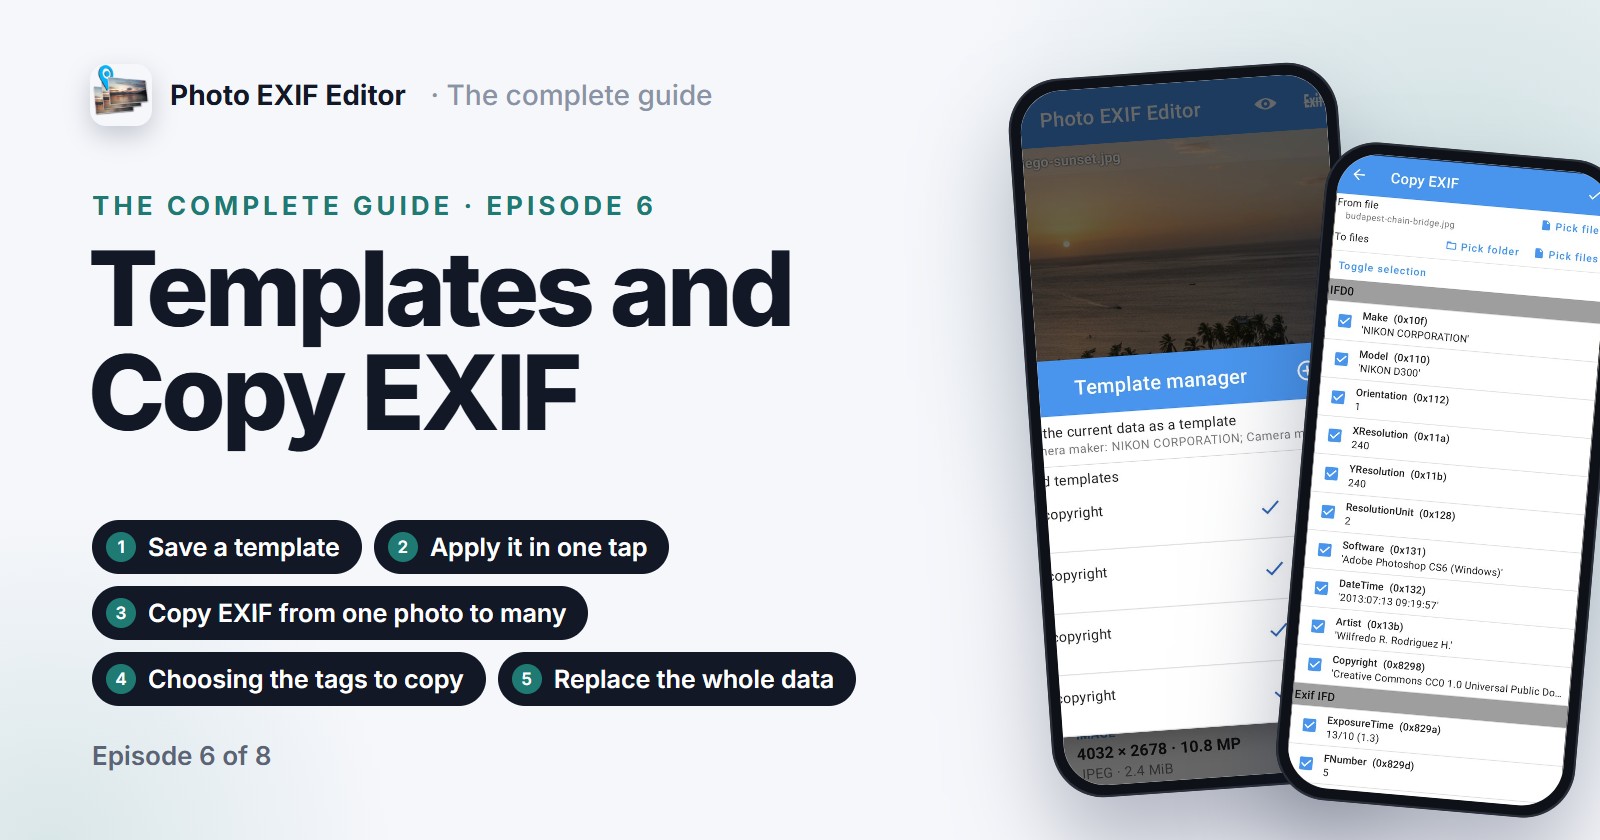
Episode 6 of our video guide to Photo EXIF Editor is about not typing the same things twice: save a template with your name, copyright and camera details and apply it in one tap, to one photo or a batch; then use Copy EXIF to take the information from one photo and write it into others.
On this page
This is the sixth episode of The complete guide to Photo EXIF Editor. The two tools in this episode share one goal: not typing the same things twice. A template saves the values you use often, such as your name, your copyright notice or the details of a lens, and applies them in one tap. Copy EXIF takes the information stored in one photo and writes it into others, which is the fastest way to repair photos that lost their metadata.
Watch the episode above, or read on.
Templates
When a template helps
Every photo you publish should carry your name and a copyright notice. Every photo from a manual lens could carry the lens's focal length and aperture, which the camera couldn't record. Every photo from a client job should carry the client's instructions and a job identifier. Typing these into each photo, or even into each batch, gets old fast. A template holds a set of fields with their values, and fills them in wherever you apply it.
Save a template
The easiest way to make a template is from a photo that already has the values you want:
- Open the photo, open the ⋮ menu and tap Template manager.
- Tap the save icon next to Save the current data as a template.
- Give the template a name and, if you like, a description.
- The list shows the fields it will contain, taken from the photo. Remove any field you don't want with its bin icon (you almost certainly don't want the captured time or the location in a reusable template), or add one with Add tag.
- Tap ✓ to save it.
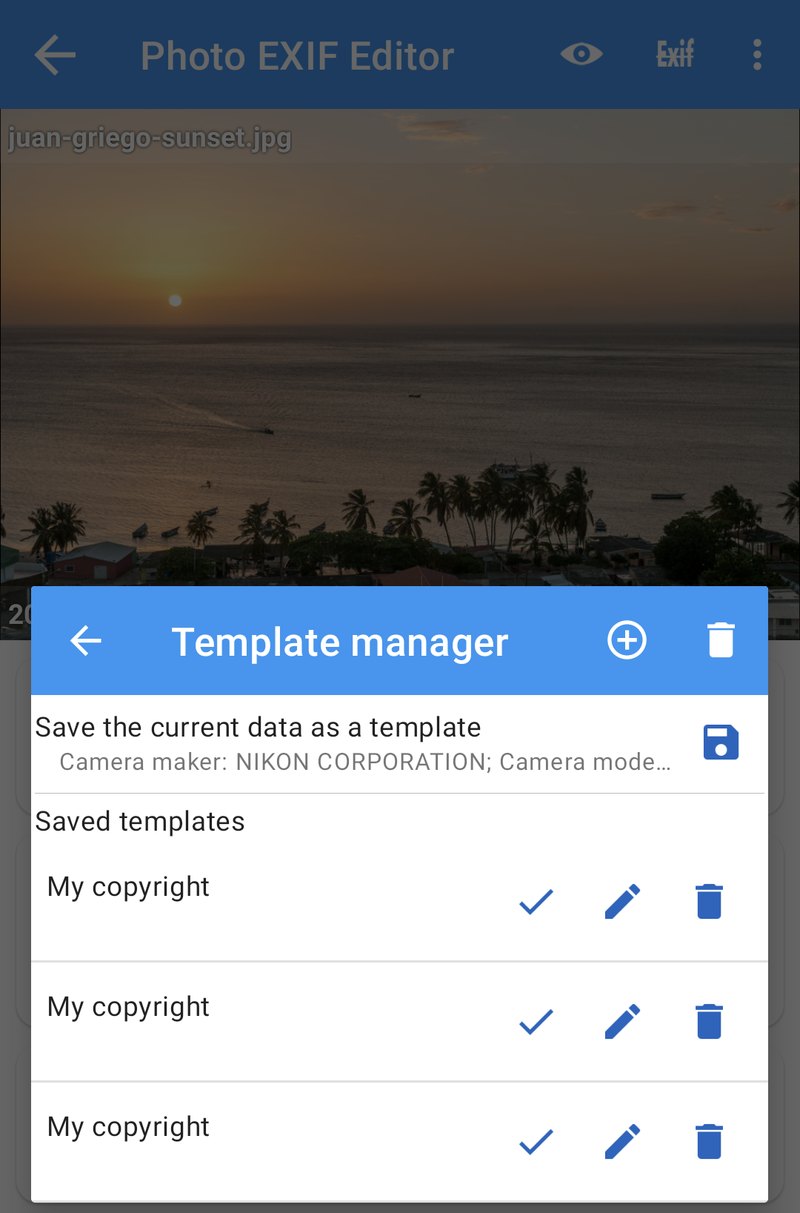
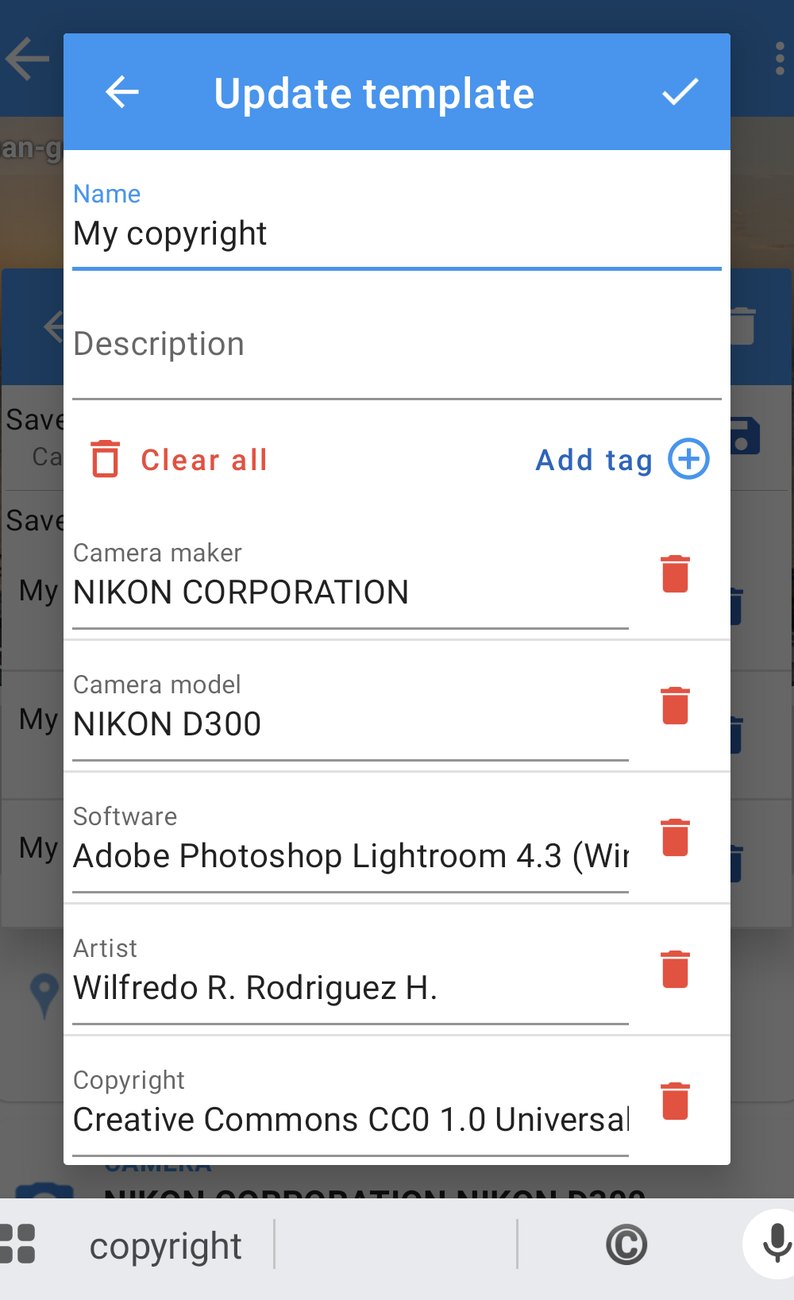
You can also build a template from scratch with the + button: name it, add the tags you want, and type their values.
A good first template is "My copyright" with Artist, Copyright, and the IPTC Creator and Copyright notice. A second one, "50 mm manual lens", with the focal length, aperture and lens model, is handy if you shoot with lenses the camera doesn't recognise.
Apply a template
- Open any photo, or a whole batch of photos (Episode 4).
- Open the ⋮ menu and tap Template manager.
- Tap the ✓ next to your template.
- The Apply template window lists its fields. Untick any you don't want this time.
- Confirm, and the values are filled in. Tap Save to write them.
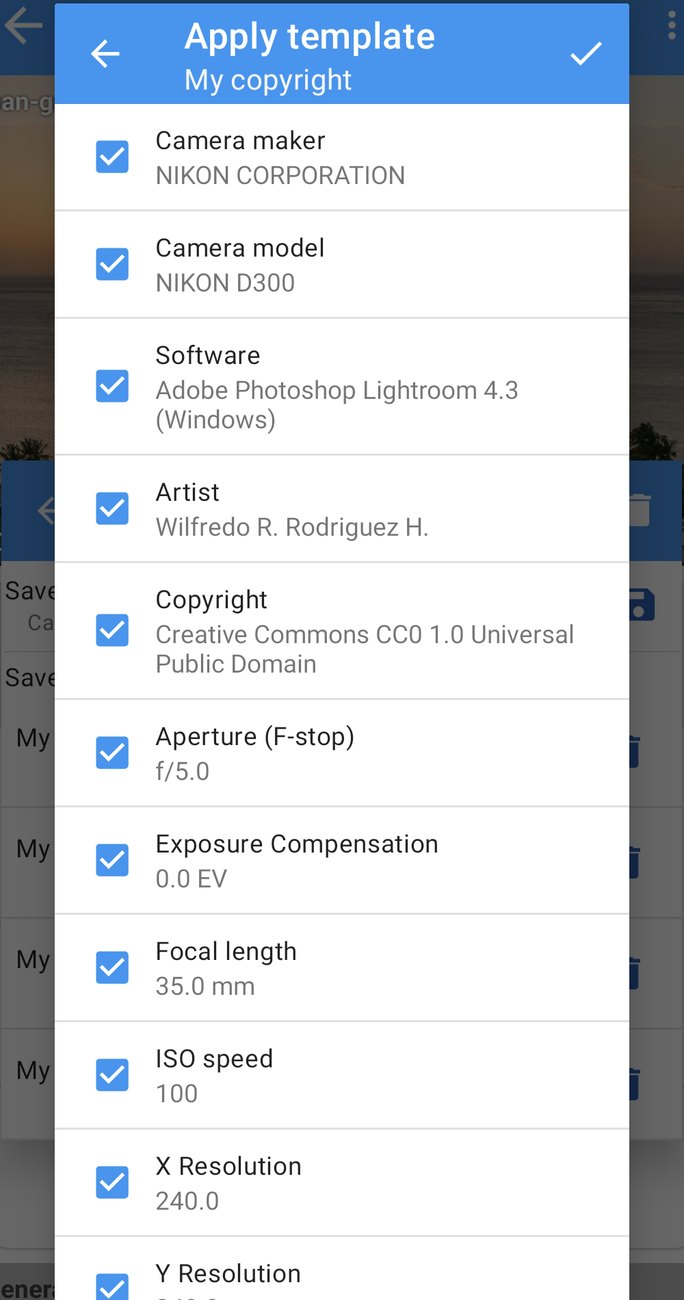
Applied to a batch, a template puts your name and copyright on a whole trip in a few taps. The pencil next to a template edits it, and the bin deletes it. Templates are kept on the phone, inside the app, so they survive restarts, but not an uninstall.
Copy EXIF
When Copy EXIF helps
Copy EXIF is for photos from the same shoot where some have the right data and others don't:
- After an editing app. Many editing and collage apps strip the EXIF from their exports, or keep only part of it. Copy it back from the original: the date, the location, the camera settings, all at once.
- Two cameras, one lens. A second body, or an old camera, that doesn't write the lens information. Copy the lens and camera fields from a photo that has them.
- Scans of the same roll. Date and place one scan by hand (Episodes 2 and 3), then copy the result to the rest of the roll.
- A phone photo as the reference. Took one phone photo next to your camera? Copy its location to the camera's photos from that spot.
In every case there's one source photo and as many destination photos as you like.
Copy the information
Open Copy EXIF from the editor's ⋮ menu, with the current photo as the source, or from Misc tools on the home screen.
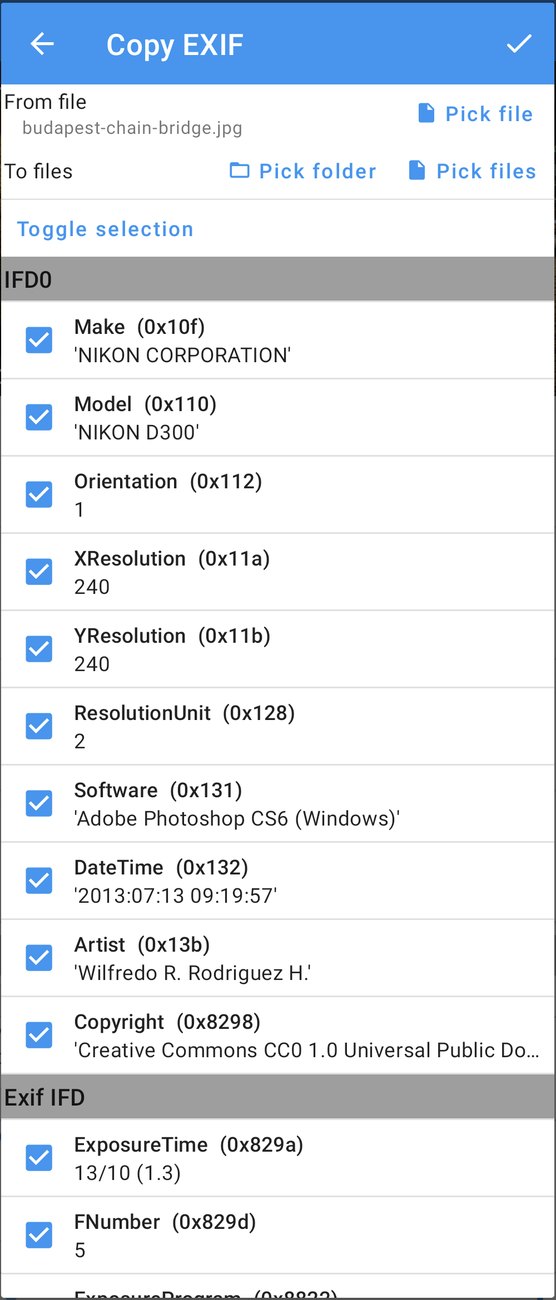
- From file is the source photo. Tap Pick file to choose another one.
- To files are the destinations. Tap Pick files to choose individual photos, or Pick folder to use every photo in a folder.
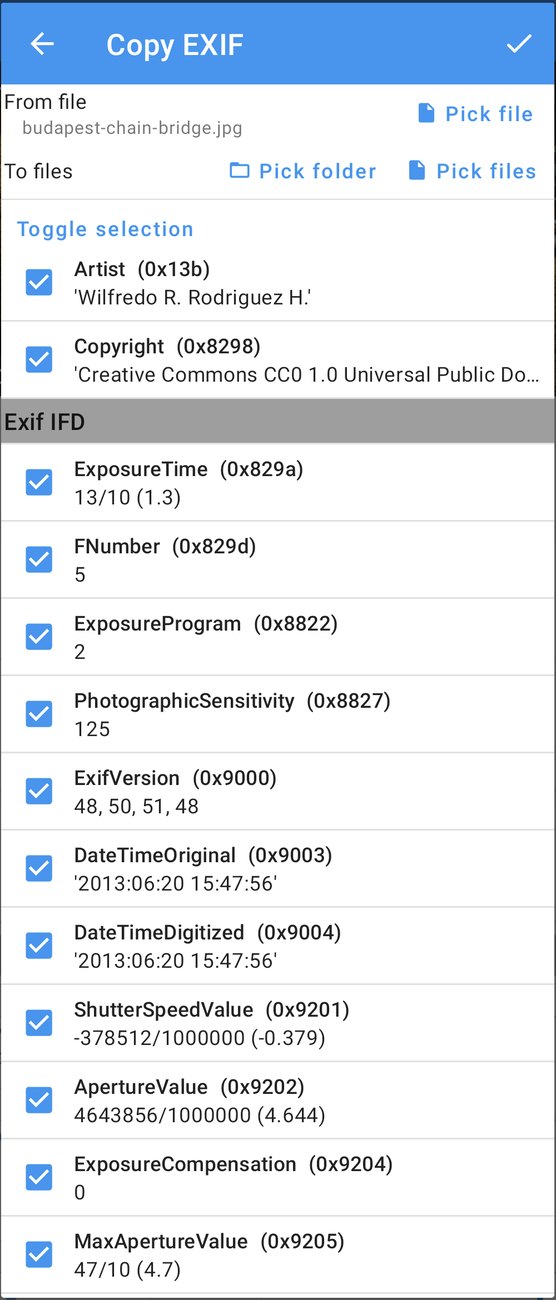
- Choose the tags to copy. All the tags that are safe to copy are selected; Toggle selection selects all or none.
- Tap ✓ to copy. The information is written into every destination photo, and a progress window shows each one.
By default, Copy EXIF only copies the tags it can read and write safely, and keeps everything else in the destination photos. A destination keeps its own pixels, of course, and its own values for every tag you didn't select.
Which tags, and the warning icons
Some tags are flagged with a warning icon: they hold binary data (an embedded thumbnail, maker notes), or values that belong to the source camera specifically (a serial number, a shutter count). Tap the icon to see why. Leave them unticked unless you know you need them; copying a serial number into photos from another camera is rarely what you want.
Think about the dates and the location too. They're copied when selected, which is right for an edited export of the same photo, and wrong for photos taken at another time or place. Untick Captured time and Geolocation when the destinations are different photos from the same shoot, and keep them when the destinations are copies of the source.
IPTC fields are copied too, when the source has them, which makes Copy EXIF a quick way to spread a caption, keywords and a copyright notice from one photo to a set.
Replace the whole data
The option Replace the whole data goes further than copying selected tags: it replaces all the EXIF in the destination photos with the source's complete EXIF block, byte for byte. Use it only when the destinations really should become exact metadata copies of the source, for example exports of the same photo that lost everything. For different photos, leave it off and copy selected tags instead.
Templates or Copy EXIF?
They overlap a little, so here's the rule of thumb:
- Values that are about you or your gear and stay the same for months (name, copyright, lens details, client instructions): a template.
- Values that are about one shoot and already exist in one photo (date, place, camera settings, a caption): Copy EXIF.
- Values that are about one photo (its title, its description): the editor.
Both work on batches, both keep the picture itself untouched, and both go through the normal save, so Android's permission request for photos created by other apps (Episode 4) applies here too.
Recipes
Add your name and copyright to all your photos. Make the "My copyright" template once. Folder by folder: Select all, Edit, ⋮ → Template manager, ✓, Save.
Restore the EXIF after editing. Open the original in the editor, ⋮ → Copy EXIF, Pick files and choose the edited export, keep the dates and the location ticked, ✓.
Give a second camera's photos the lens details. Open a photo from the first camera, ⋮ → Copy EXIF, Pick folder for the second camera's folder, untick everything except the lens and camera tags, ✓.
A whole roll of scans. Set the date and the location on one scan, then ⋮ → Copy EXIF, Pick folder, keep Captured time and Geolocation ticked, ✓.
What's next
In Episode 7: The Photo map we look at your photos by place instead of by date: open an album on the map, fly from photo to photo, place a photo that has no location, and spot the one that landed in the wrong place.
The full series:
- Getting started
- Dates and times
- Locations and geotagging
- Batch editing
- IPTC and the camera fields
- Templates and Copy EXIF (this episode)
- The Photo map
- Privacy and the HEIC/AVIF converter
Get the app
- Photo EXIF Editor (free): https://play.google.com/store/apps/details?id=net.xnano.android.photoexifeditor
- Photo EXIF Editor Pro (no ads): https://play.google.com/store/apps/details?id=net.xnano.android.photoexifeditor.pro
The sample photos in this series are CC0 photos from Wikimedia Commons.
Videos
Related posts
Photo EXIF Editor Guide, Episode 8: Privacy and the HEIC/AVIF Converter
The last episode of our video guide to Photo EXIF Editor: what a photo gives away, removing the location, the camera details or everything before it goes online, and converting HEIC, HEIF and AVIF photos to JPEG or PNG with their metadata kept.
Photo EXIF Editor Guide, Episode 7: The Photo Map
Episode 7 of our video guide to Photo EXIF Editor is about the Photo map: your albums on a map, flying from photo to photo, placing a photo that has no location, spotting the one that landed in the wrong place, and the map views and settings.
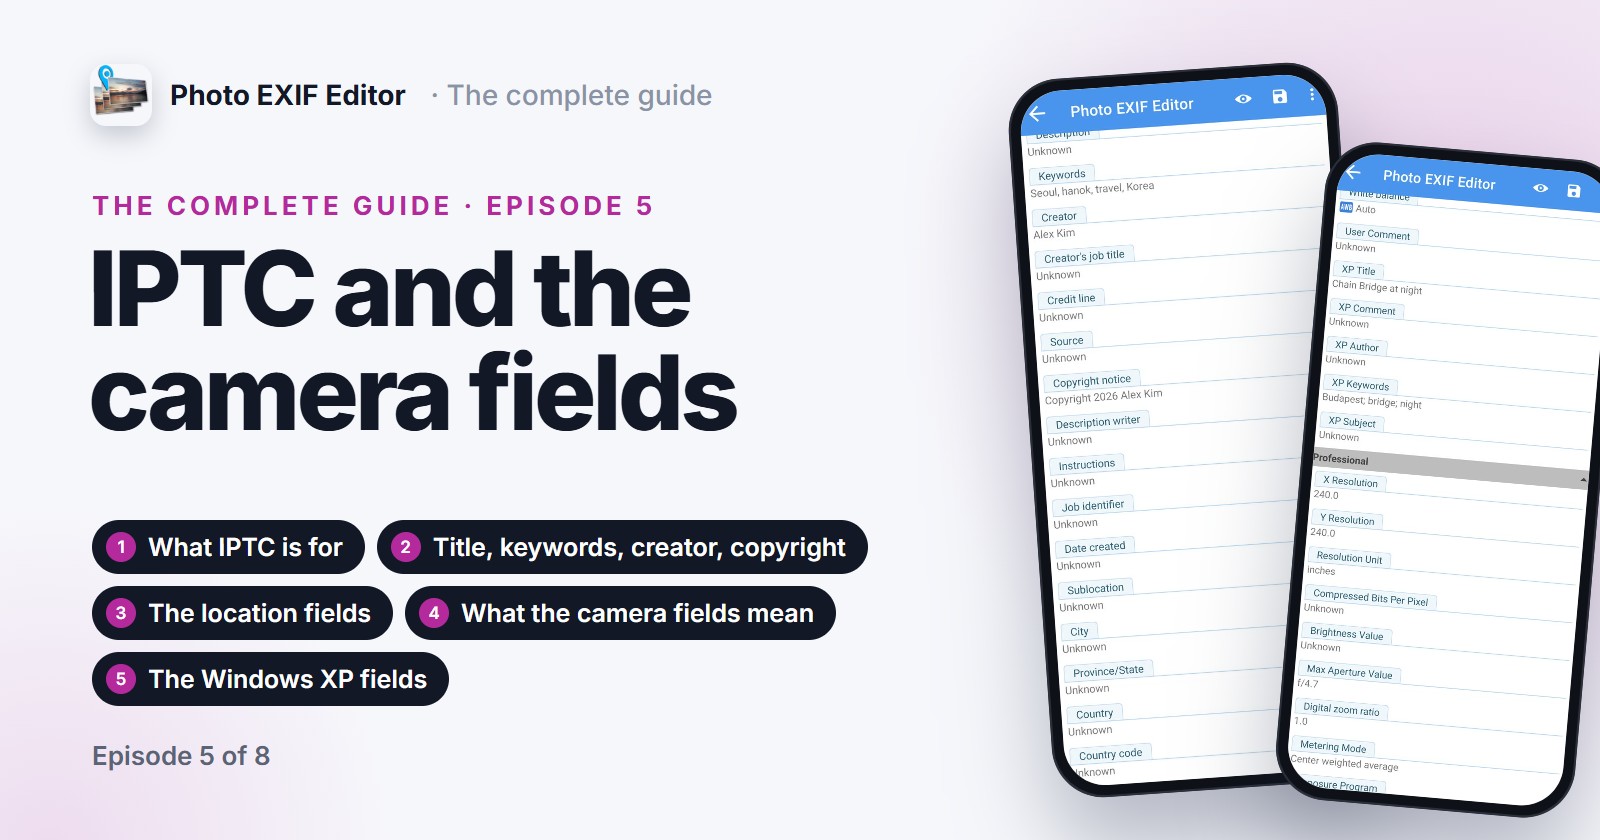
Photo EXIF Editor Guide, Episode 5: IPTC and the Camera Fields
Episode 5 of our video guide to Photo EXIF Editor covers IPTC, the fields photo libraries, stock sites and newsrooms read: titles, keywords, creator, copyright and the location fields. Then it decodes the camera fields in the Advanced section, from aperture and exposure time to orientation and the Windows XP fields, in plain words.