How to Use Notedrift: A Step-by-Step Guide
Set up Notedrift, record a take with a MIDI keyboard or the microphone, read your review, listen back and practise the passages that need work, step by step.
On this page
This guide walks you through every part of Notedrift, step by step: setting up the app, recording a take, reading your review, listening back, and practising the passages that need work. Each step has a screenshot, so you can follow along on your phone.
Notedrift works on Android phones and tablets running Android 10 or later. Everything it does happens on your device: there is no account, no ads, and nothing you play is uploaded.
1. Choose your level
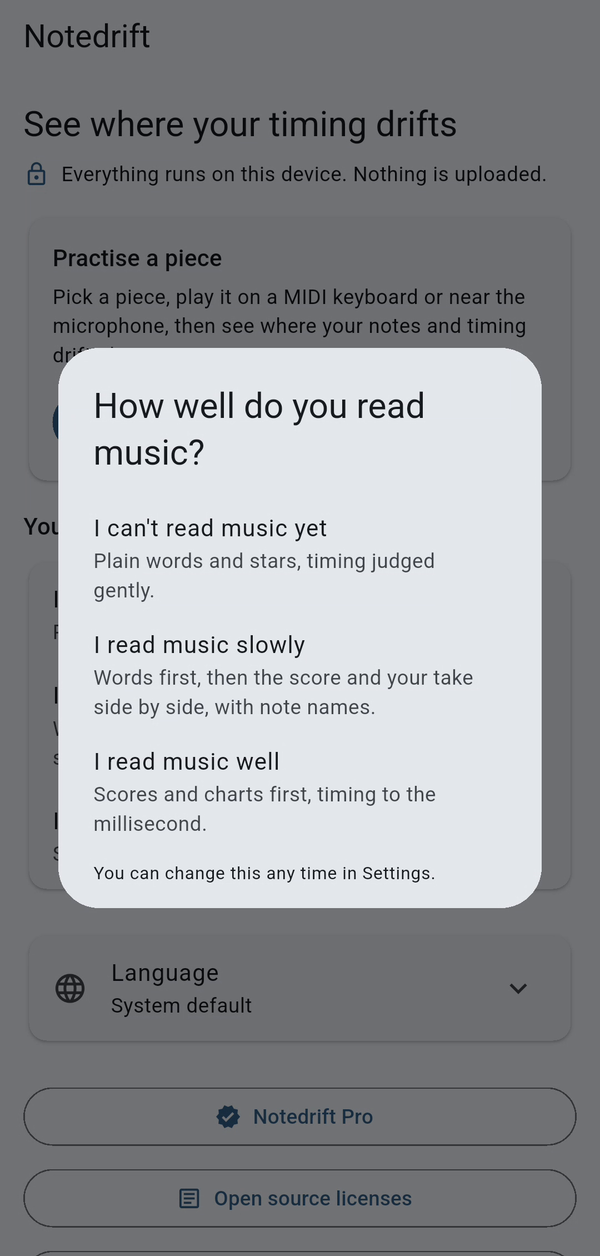
The first time you open Notedrift, it asks how well you read music:
- I can't read music yet: plain words and stars, with timing judged gently.
- I read music slowly: words first, then the score and your take side by side, with note names.
- I read music well: scores and charts first, with timing measured to the millisecond.
Pick the one that fits you. It changes how your reviews are explained and how strictly your timing is judged. You can change it at any time on the home screen.
2. Find your way around the home screen
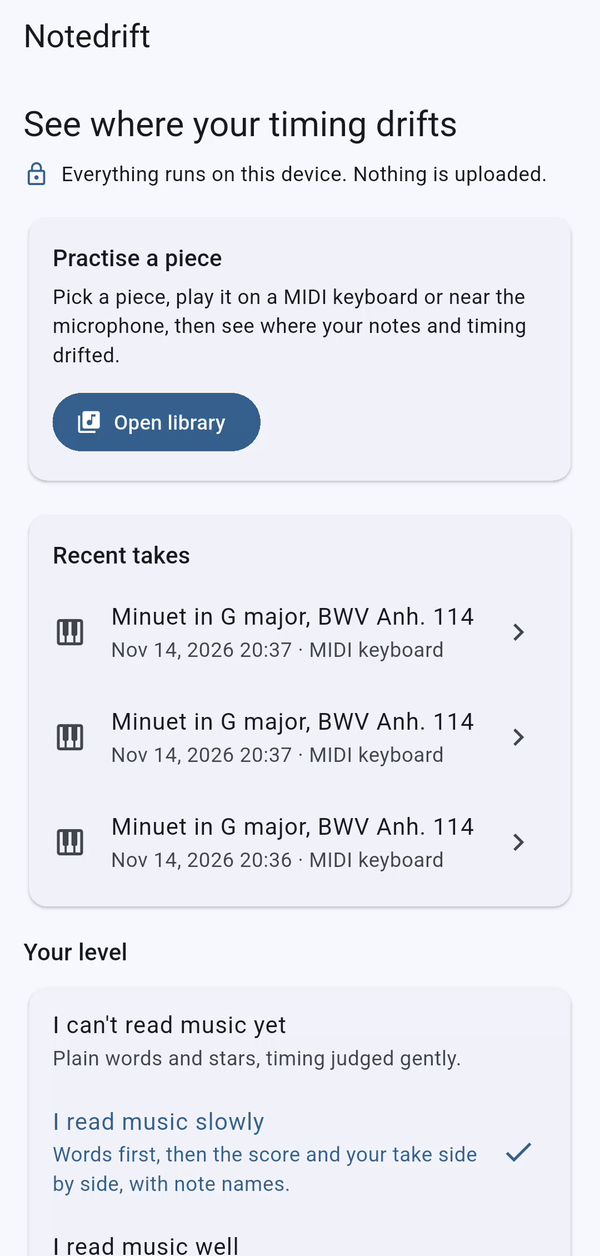
The home screen is where everything starts:
- Open library takes you to the pieces you can practise.
- Recent takes lists your latest recordings. Tap one to open its review straight away.
- Your level is the choice you made in step 1.
- The language row, with the globe icon, sets the app language (see step 14).
- At the bottom you'll find Notedrift Pro, the open source licenses, and technical information about the app.
3. Pick a piece
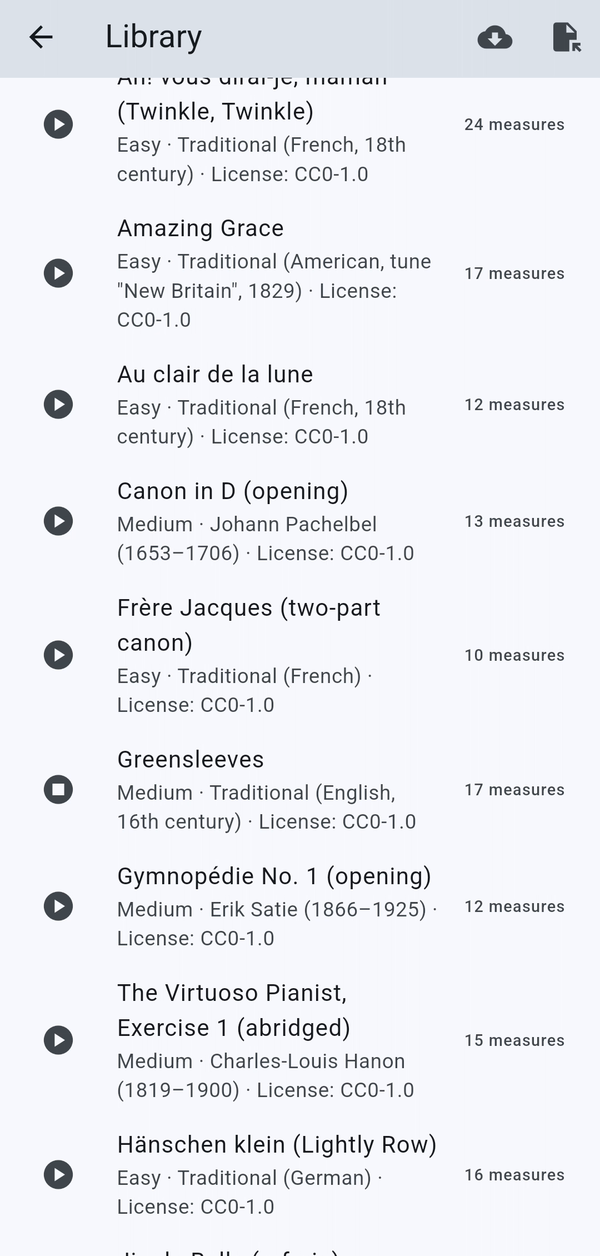
Tap Open library. Pieces that suit your level are listed first, and each one shows its difficulty, composer and license. Tap the play button next to a piece to hear how it should sound before you practise it; tap it again to stop.
Tap the piece itself to open the Record screen.
4. Choose how Notedrift hears you
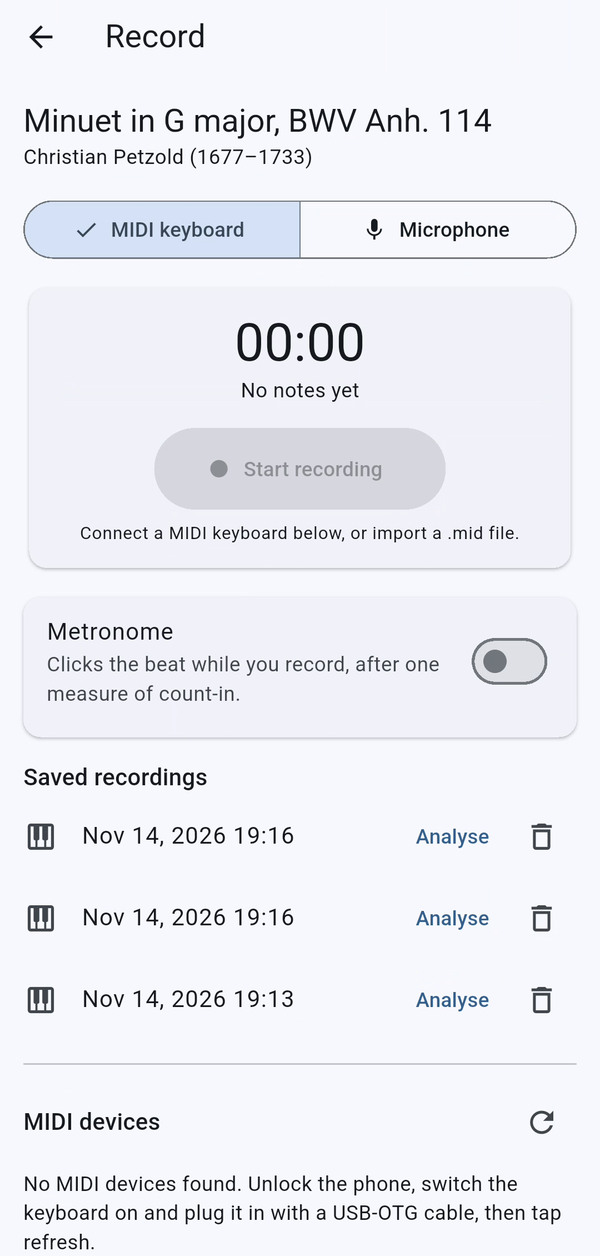
At the top of the Record screen, choose MIDI keyboard or Microphone.
With a MIDI keyboard (digital pianos and keyboards with MIDI), Notedrift receives every key press with its exact time and strength, so the review is exact, note for note.
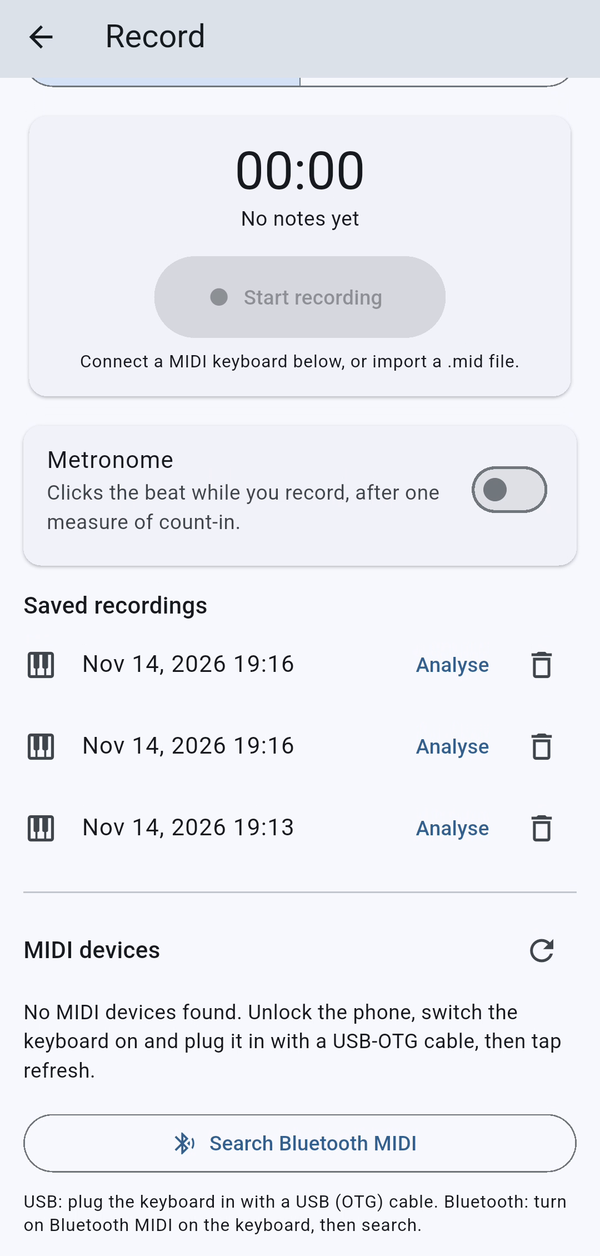
- USB: connect the keyboard to your phone with a USB OTG cable. It appears under MIDI devices. If it doesn't, tap the refresh button.
- Bluetooth: turn on Bluetooth MIDI on your keyboard, then tap Search Bluetooth MIDI.
With the microphone (acoustic pianos and keyboards without MIDI), put your phone on a steady surface about 1 metre from the piano, in a quiet room. Notedrift turns the sound into notes on your device and tells you how confident it is.
5. Set up the metronome
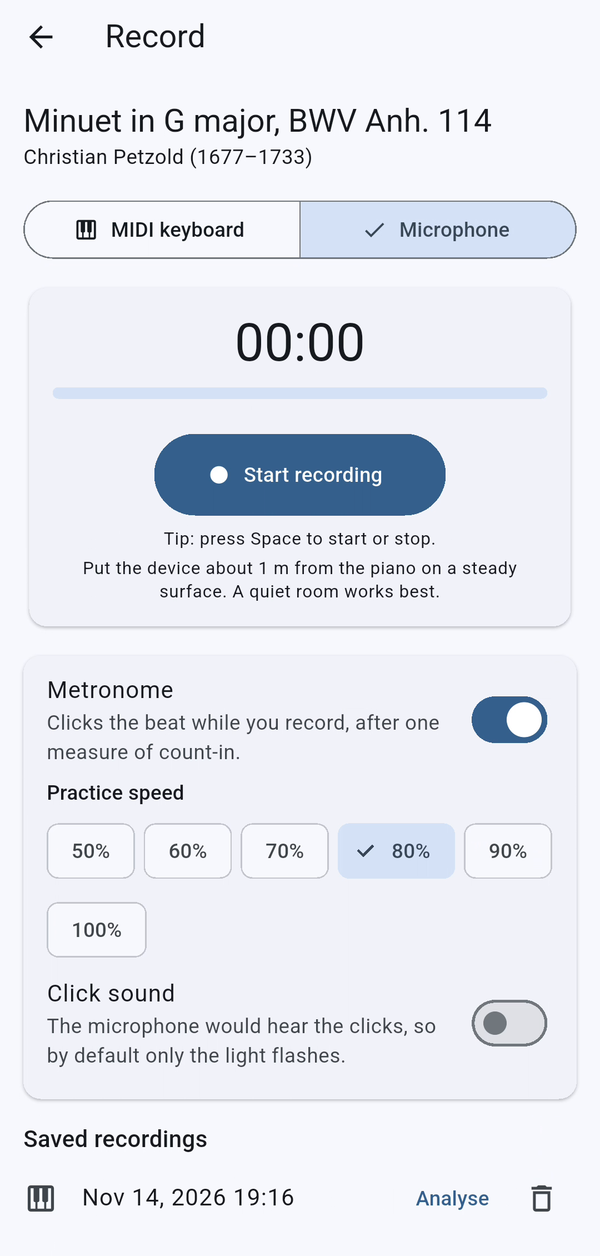
Turn on Metronome to get one measure of count-in and a steady beat while you play. Choose a practice speed from 50% to 100% of the piece's tempo.
With the microphone, the metronome only flashes by default, so its clicks don't end up in your recording. Turn on Click sound if you want to hear it anyway.
6. Record your take
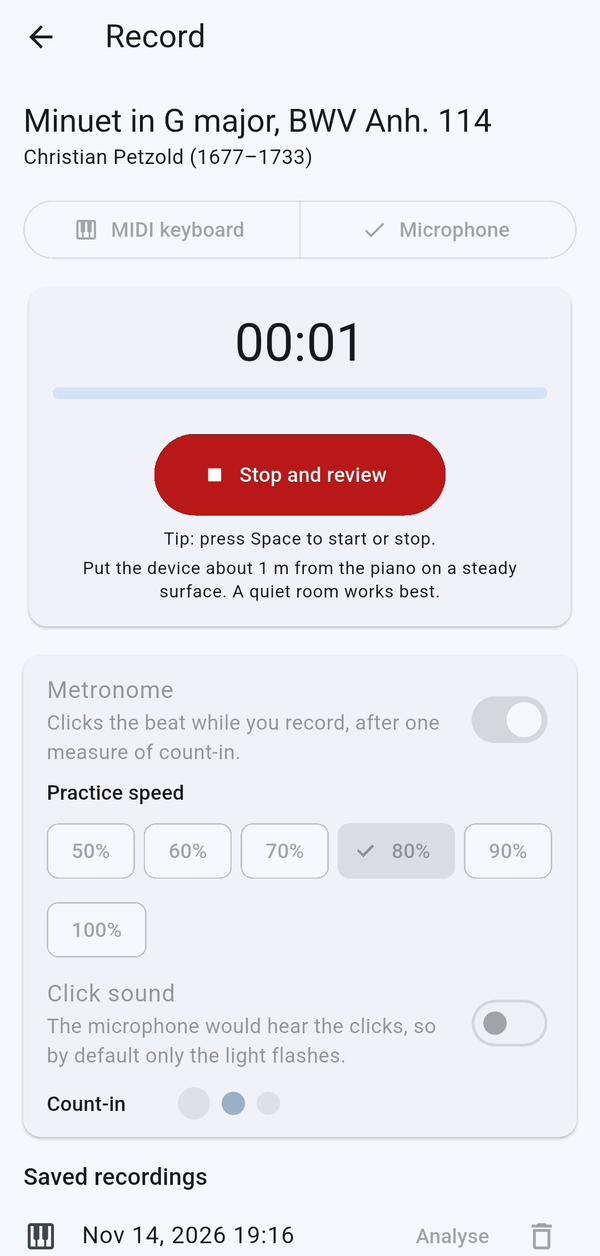
Tap Start recording. If the metronome is on, wait for the count-in, then play the piece from start to finish at your own pace. Nothing on the screen scrolls or asks you to keep up.
When you finish, tap Stop and review.
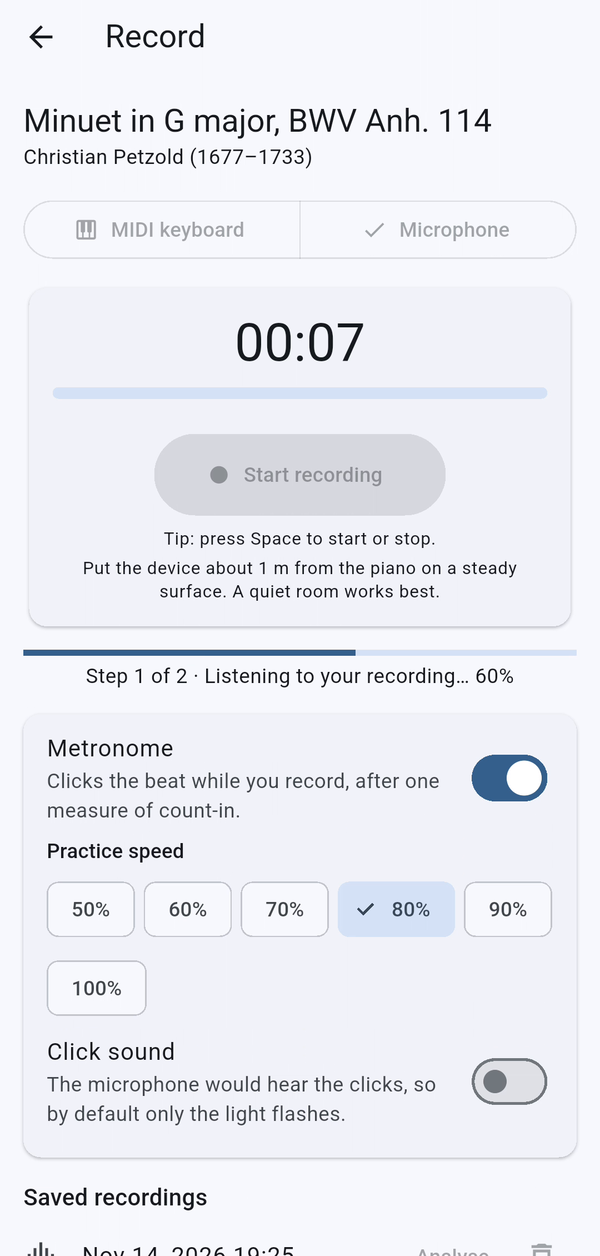
Notedrift compares your take with the score. With the microphone, it first listens to your recording (step 1 of 2), then compares (step 2 of 2). It takes a few seconds, and it all happens on your phone.
7. Keep and revisit your takes
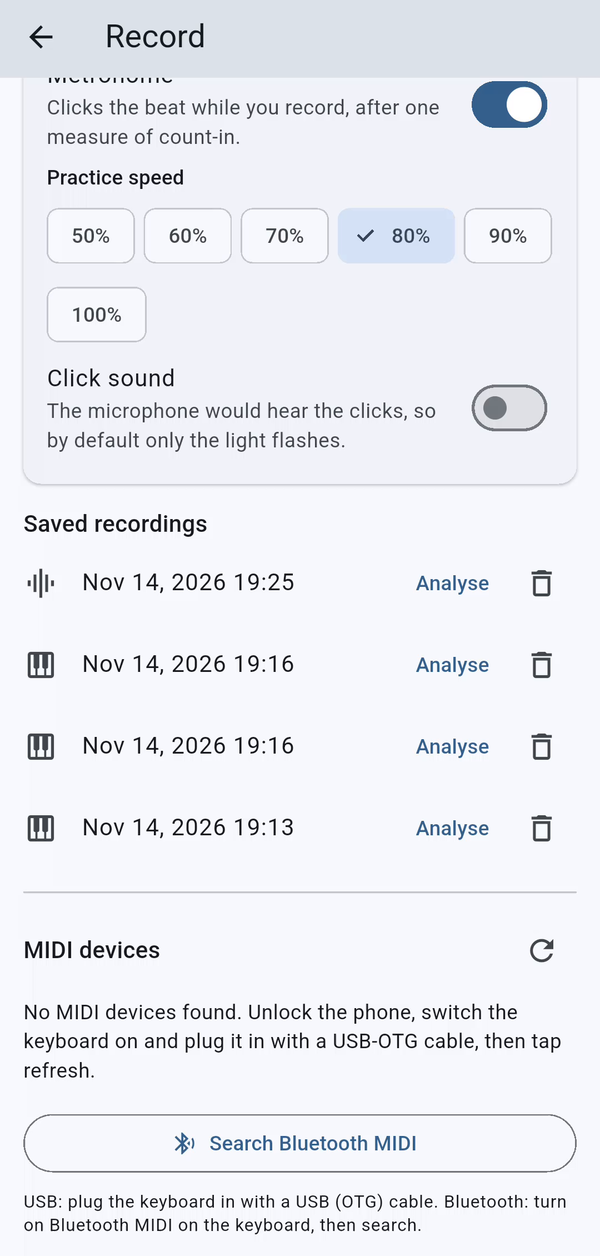
Every take is kept under Saved recordings on the Record screen. Tap Analyse to open a take's review again, or the trash icon to delete it.
8. Read your review
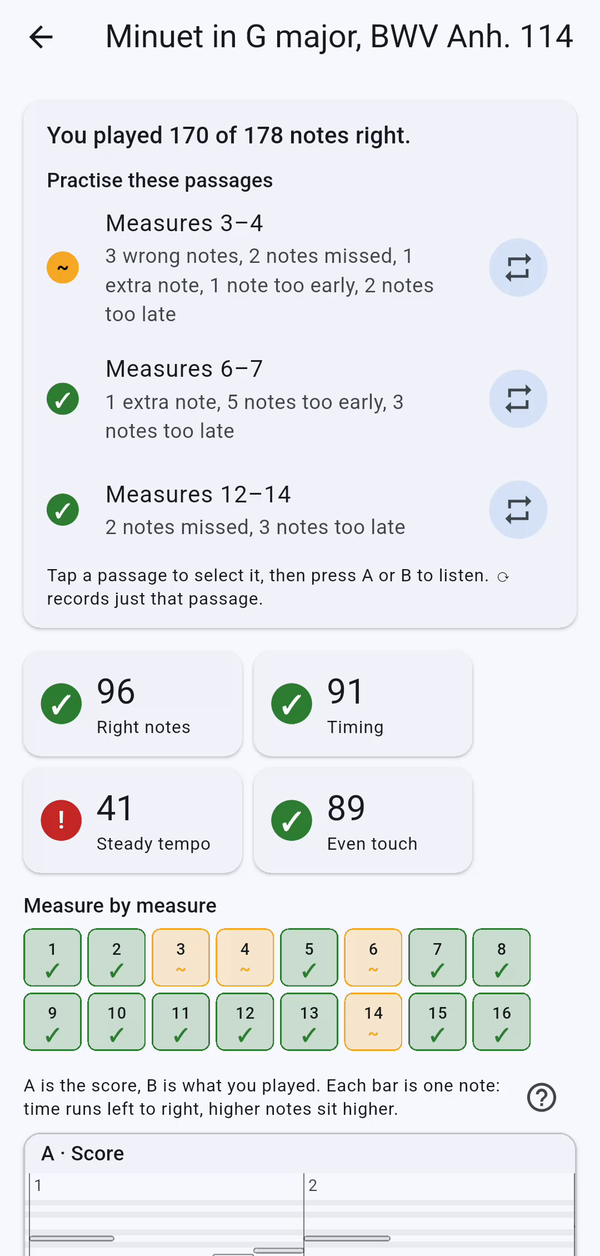
Your review starts with one plain sentence, such as "You played 170 of 178 notes right", followed by the passages that need the most work and why.
Below that are four scores from 0 to 100:
- Right notes: how many notes of the score you played correctly.
- Timing: how close each note was to its beat.
- Steady tempo: whether you kept one speed or drifted faster or slower.
- Even touch: how evenly you pressed the keys (MIDI keyboards only).
The Measure by measure grid shows every bar at a glance: green bars went well, orange bars need attention.
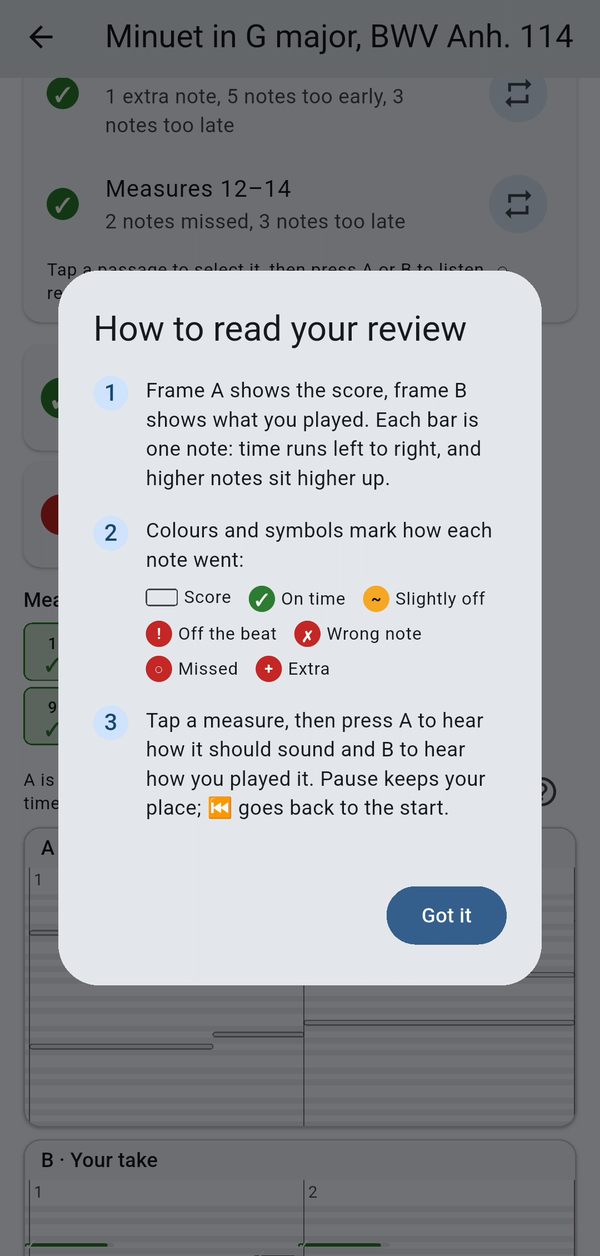
Tap the question mark at any time to see how to read the review.
9. See every wrong note and every late beat
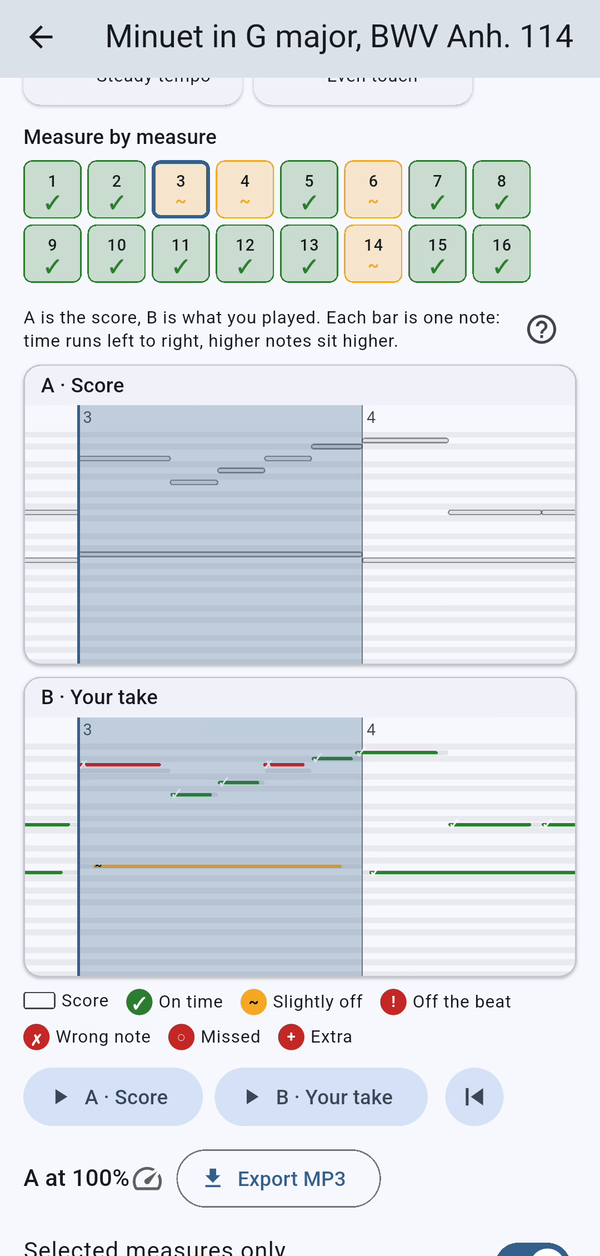
Tap a measure in the grid to jump to it. Frame A shows the score and frame B shows what you played. Each bar is one note: time runs from left to right, and higher notes sit higher up.
- Green: on time.
- Orange: slightly early or late.
- Red: a wrong note, or a note clearly off the beat.
Missed and extra notes have their own symbols too, so you never have to rely on colour alone.
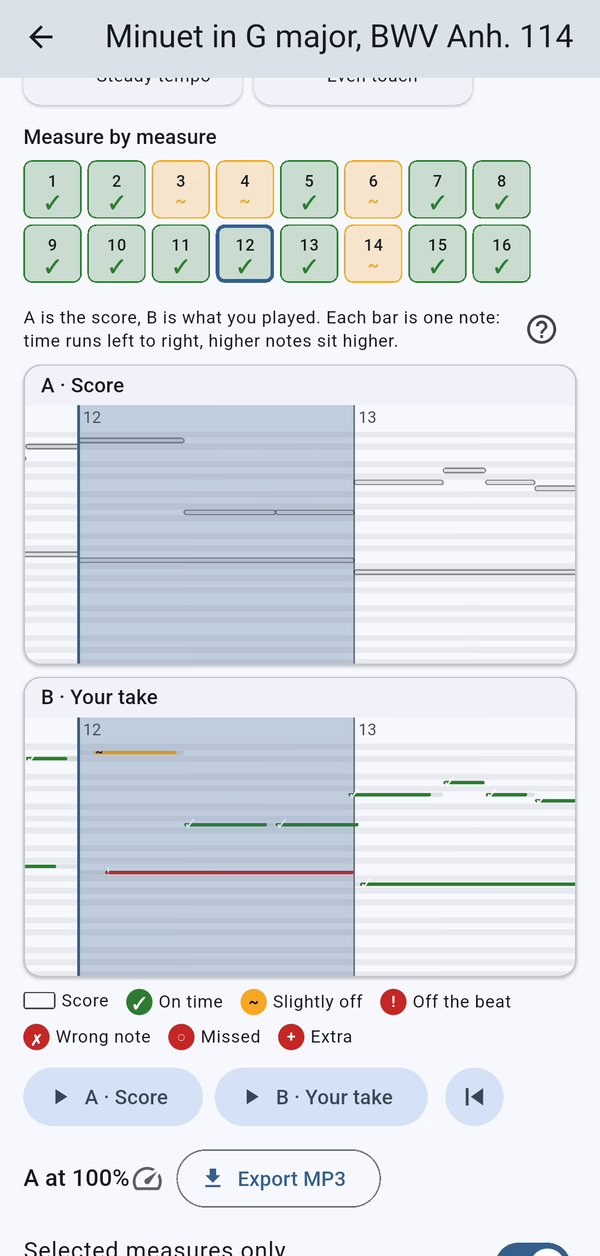
Timing matters as much as the right notes. In this measure, one note came slightly late (orange) and another clearly late (red).
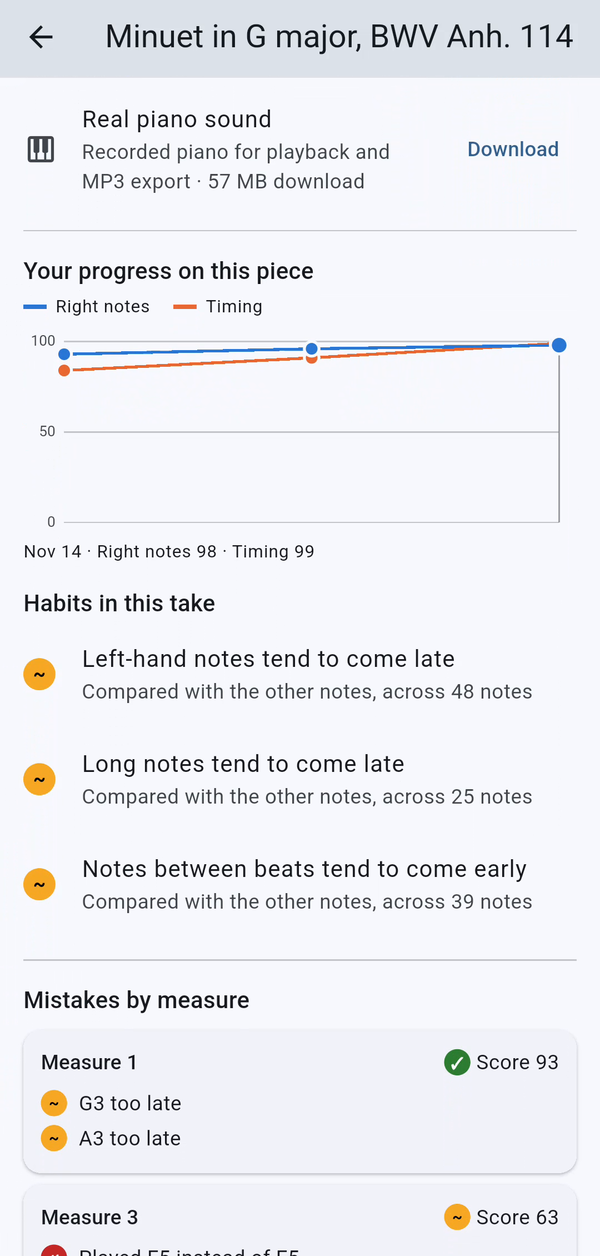
Scroll down to see Your progress on this piece, a chart of your right notes and timing across takes, and Habits in this take: mistakes that repeat, such as left-hand notes that tend to come late.
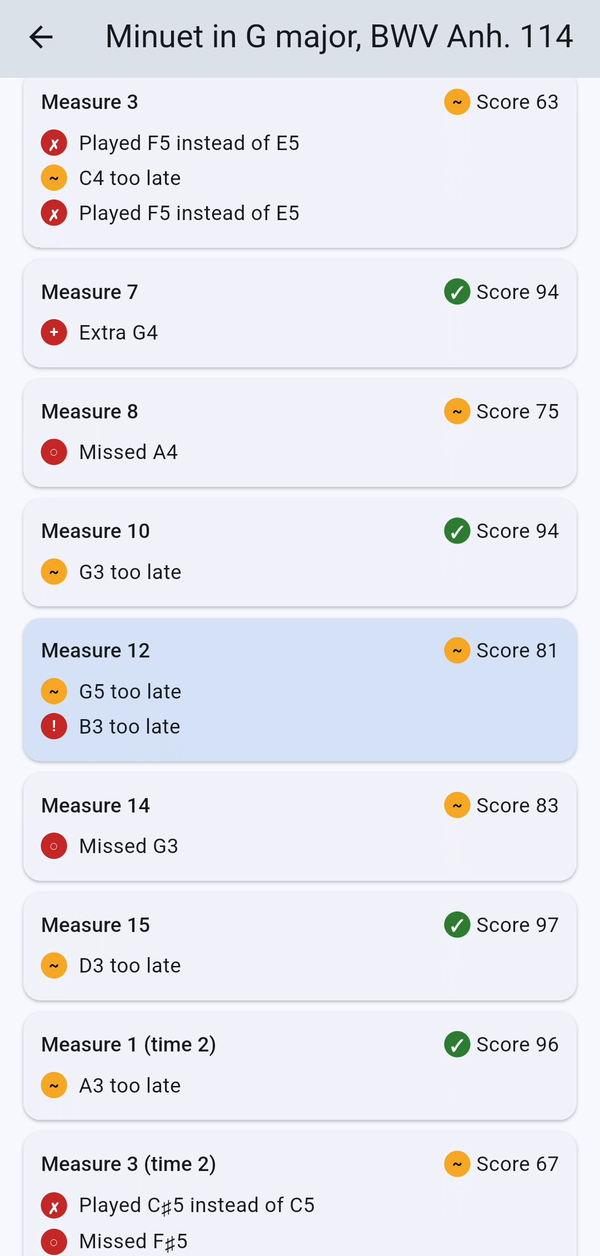
At the bottom, Mistakes by measure lists every problem in words you can act on, for example "Played F5 instead of E5" or "G5 too late".
10. Listen back: A/B
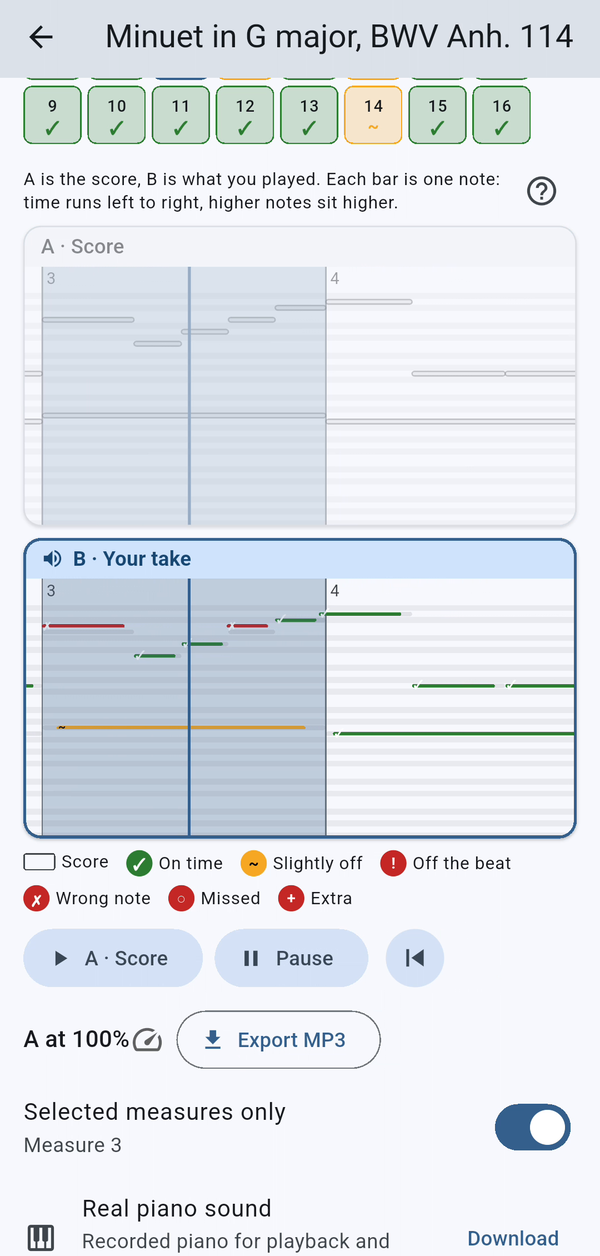
Select a measure, turn on Selected measures only, then press A to hear how it should sound and B to hear how you played it. A cursor follows the music. Hearing the two back to back often explains a mistake faster than any chart.
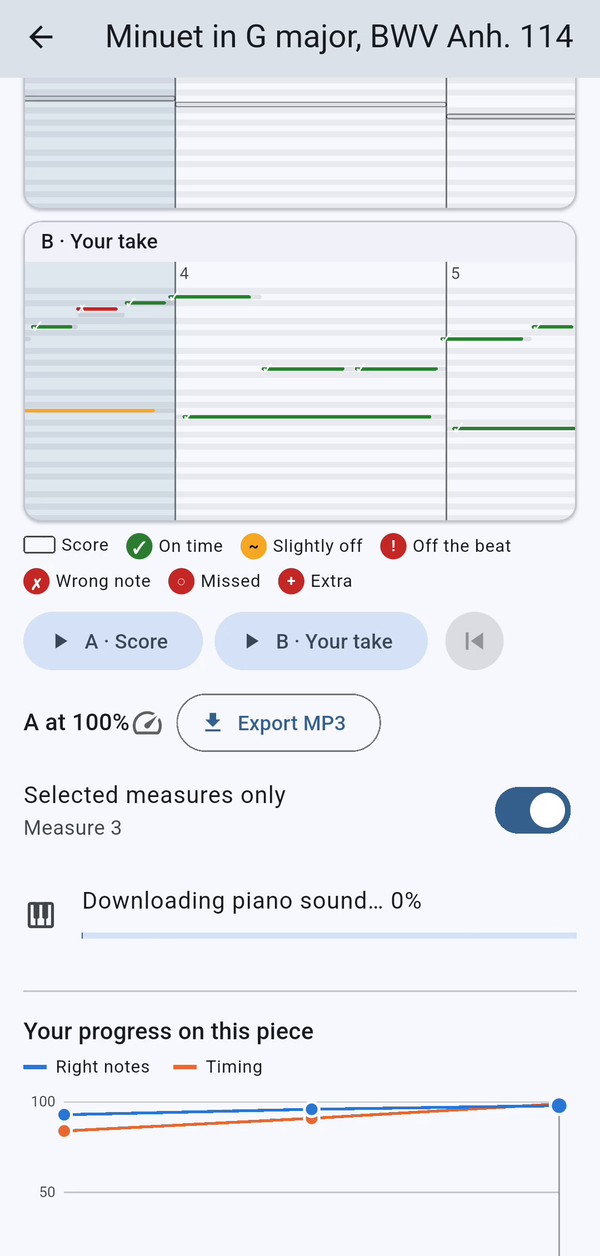
For the most natural playback, download the real piano sound, a recorded piano used for playback and MP3 export. You only need to download it once.
11. Practise slower, one passage at a time
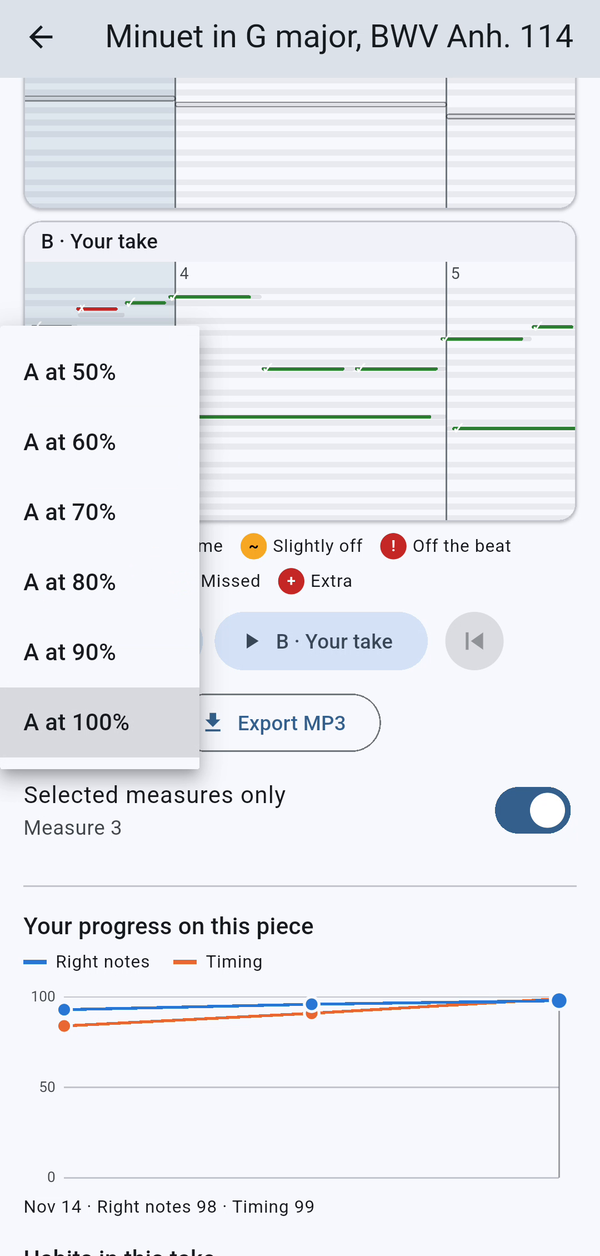
To learn a fast passage, tap the speed button next to A and choose a slower tempo for the score, from 50% to 90% (Notedrift Pro).
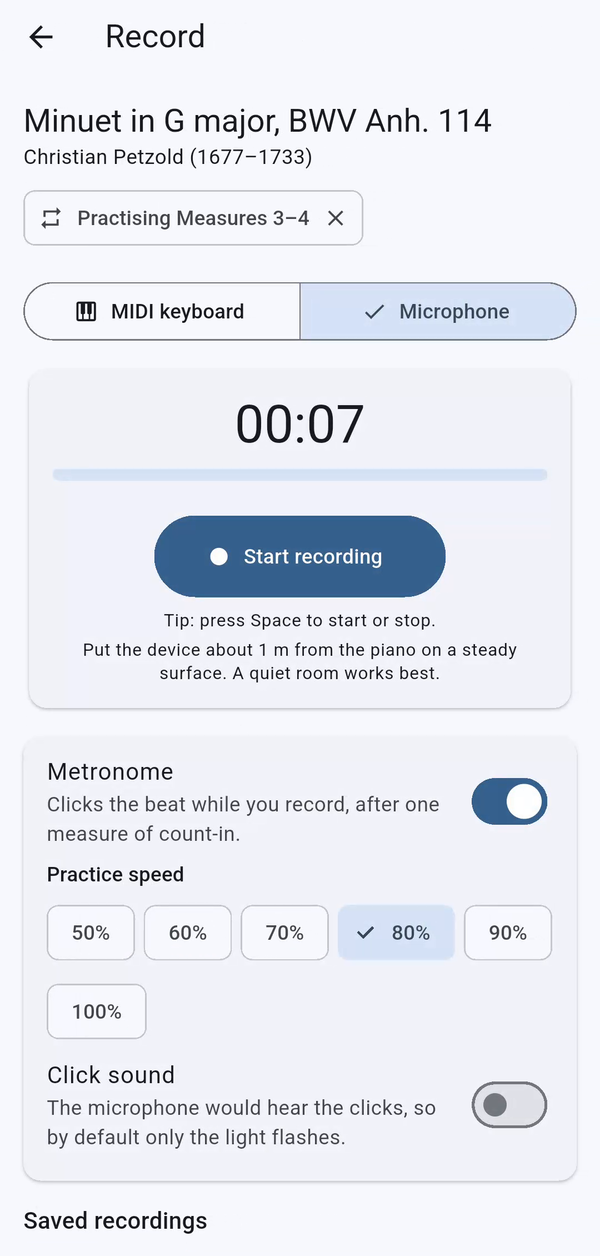
When a review suggests a passage, tap the loop button next to it. The Record screen opens in passage mode, so you record and review only those measures. Tap Play the whole piece to go back to the full piece.
12. Export and share your take
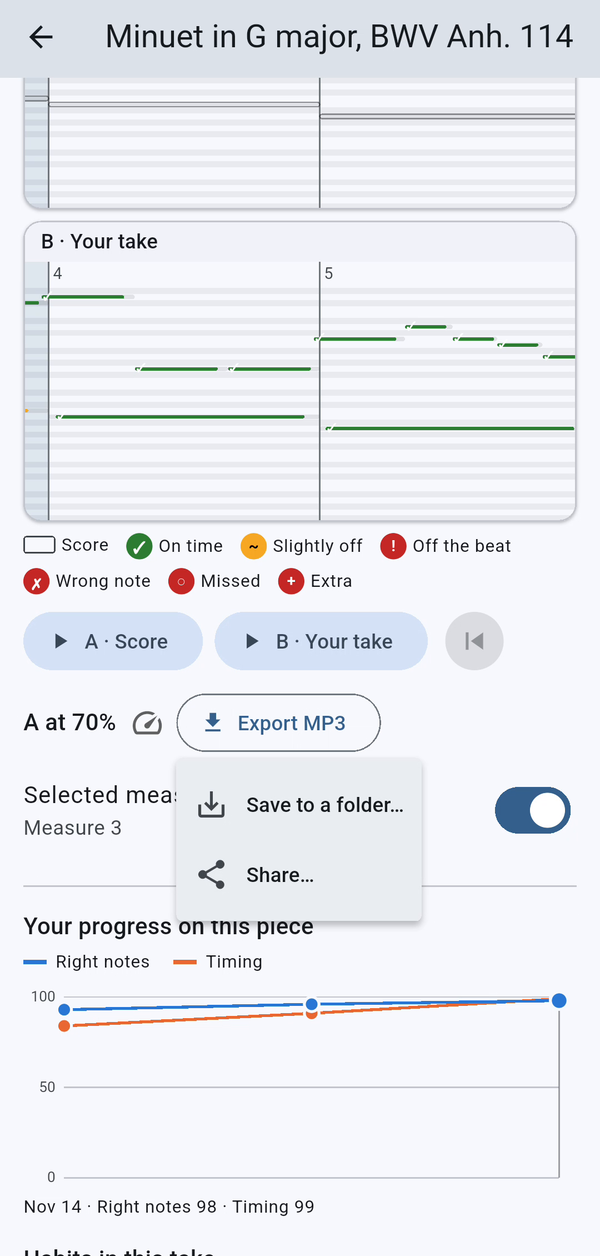
Tap Export MP3 (Notedrift Pro) and choose Save to a folder or Share.
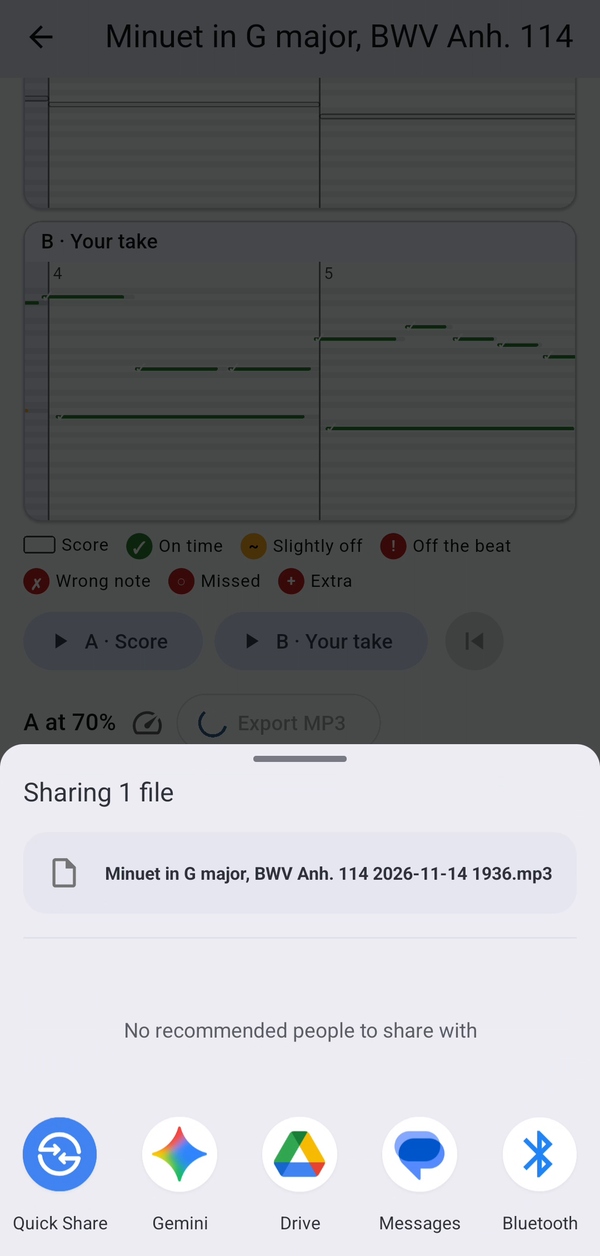
Sharing opens your phone's share sheet, so you can send the recording to your teacher or a friend.
13. If you're just starting
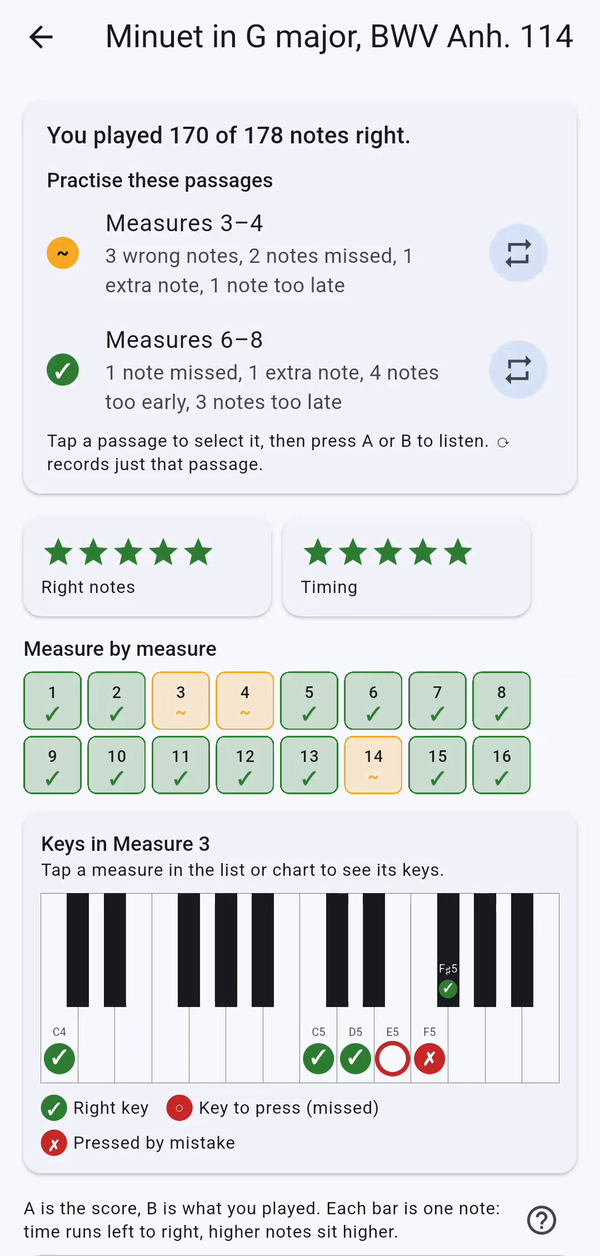
With the level I can't read music yet, the review uses stars instead of numbers, and a small piano keyboard shows the keys you played right, the keys you missed, and the keys you pressed by mistake.
14. Change the app language
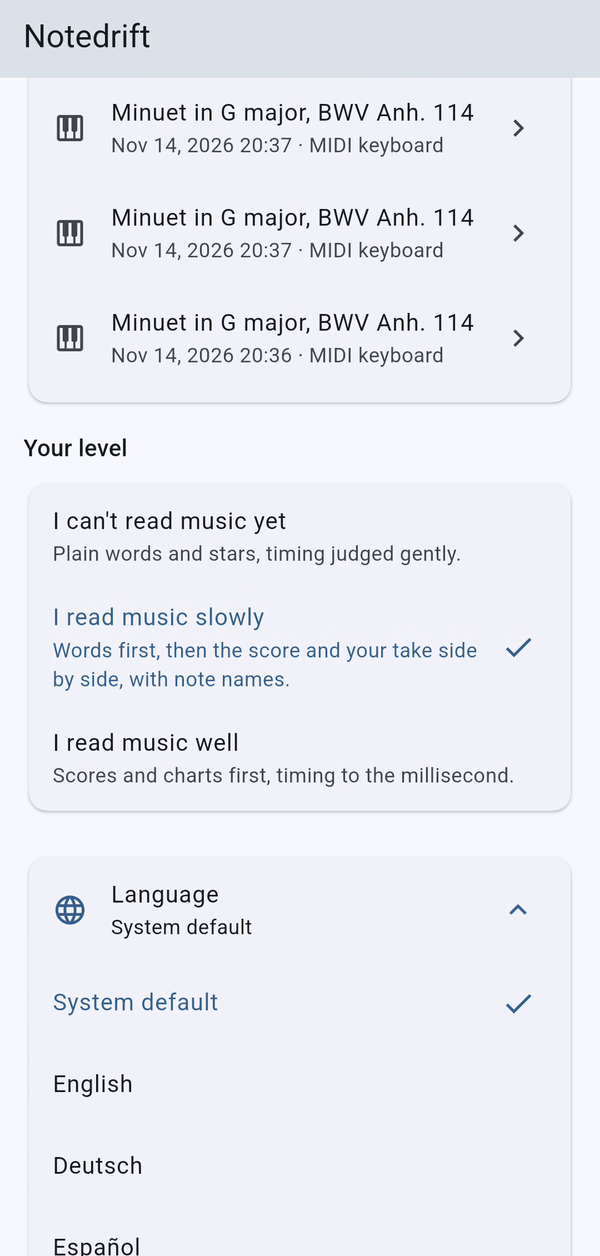
Tap the row with the globe icon to open the list. Notedrift speaks eleven languages: English, Deutsch, Español, Français, Italiano, Nederlands, Português (Brasil), Tiếng Việt, 日本語, 한국어 and 繁體中文. Each one is listed in its own name.
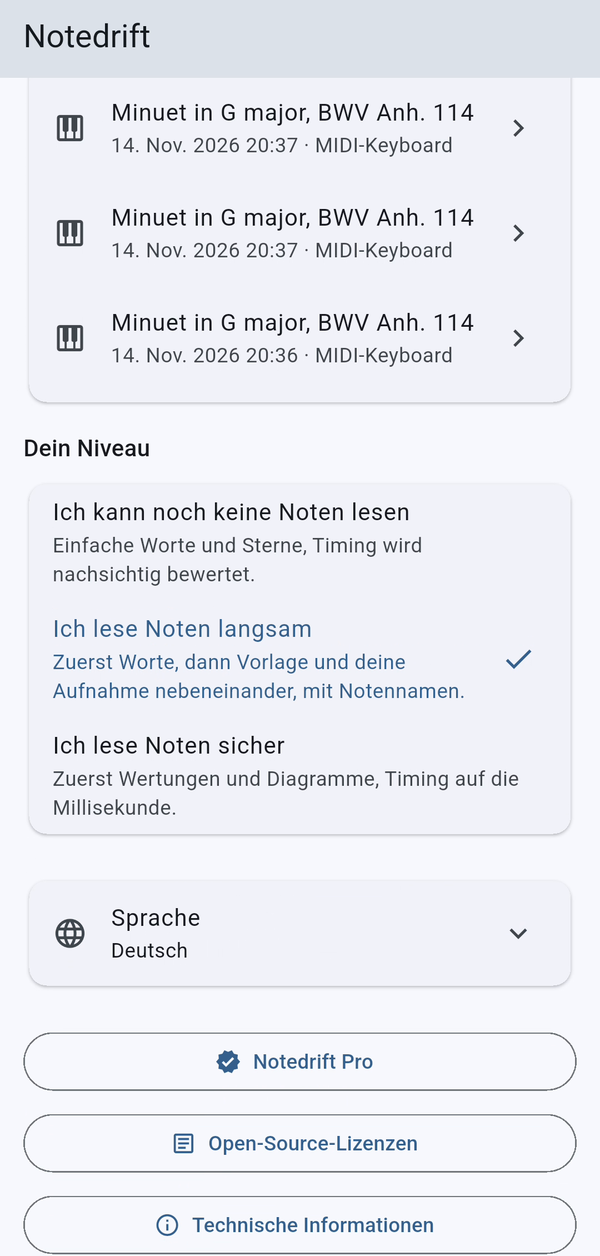
Pick yours, and the row folds again to show your choice.
15. More pieces with Notedrift Pro
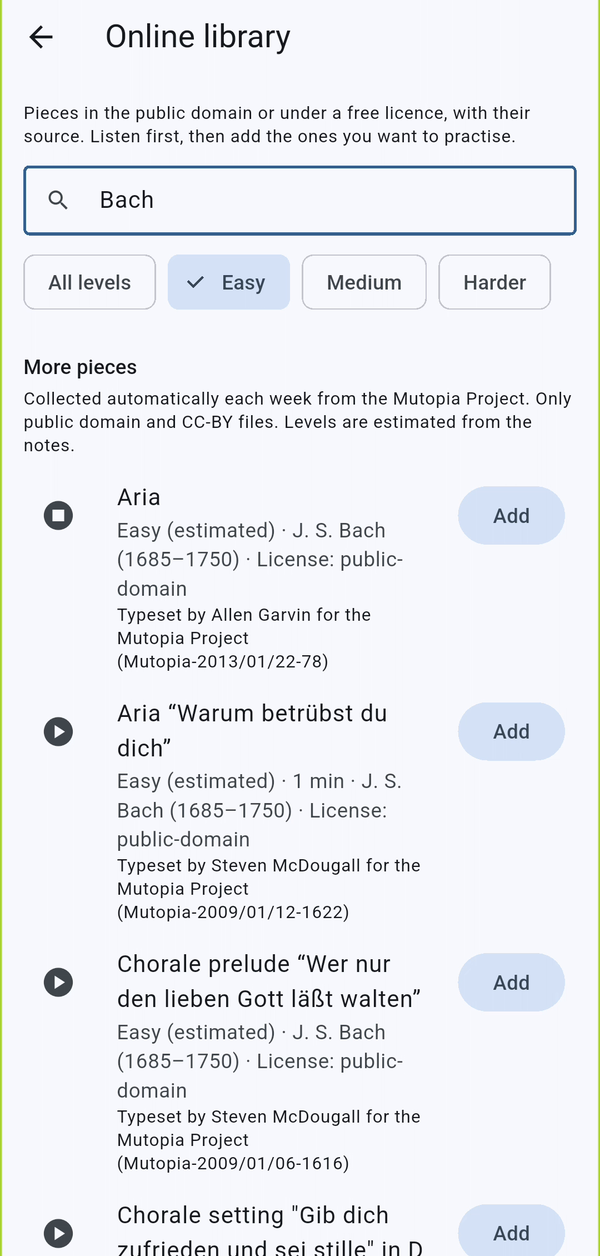
The online library (the cloud icon in the library) adds 440 freely licensed pieces, in the public domain or under a Creative Commons licence. Search by title or composer, filter by level, listen first, then tap Add.
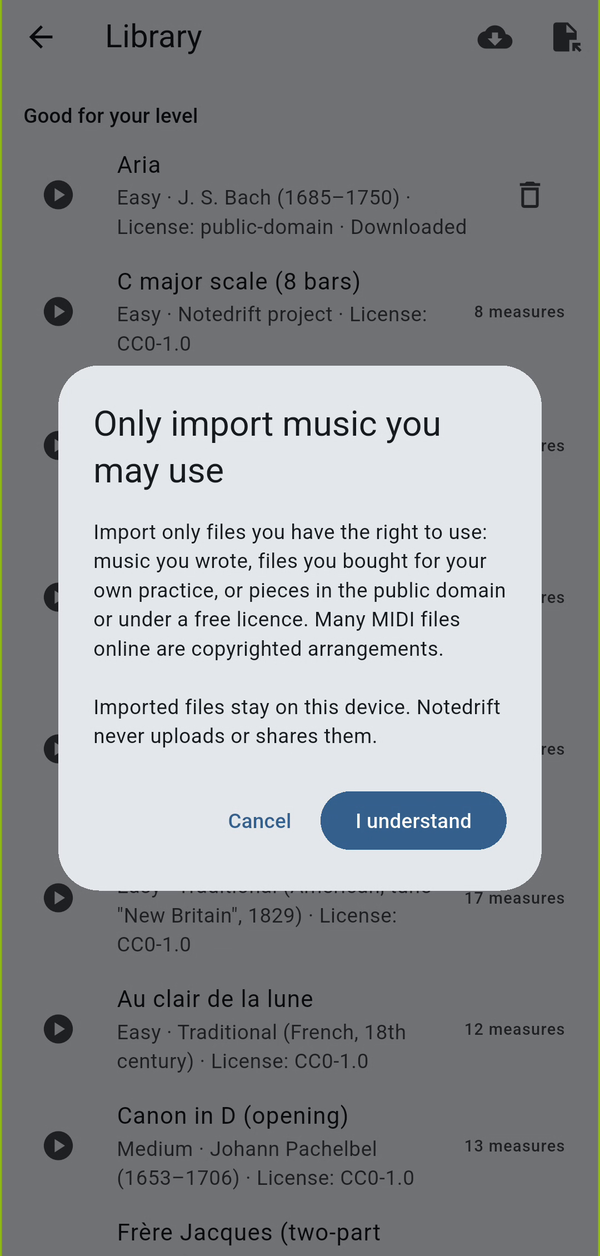
You can also import your own MIDI or MusicXML files with the import icon in the library. Notedrift reminds you to import only music you have the right to use.
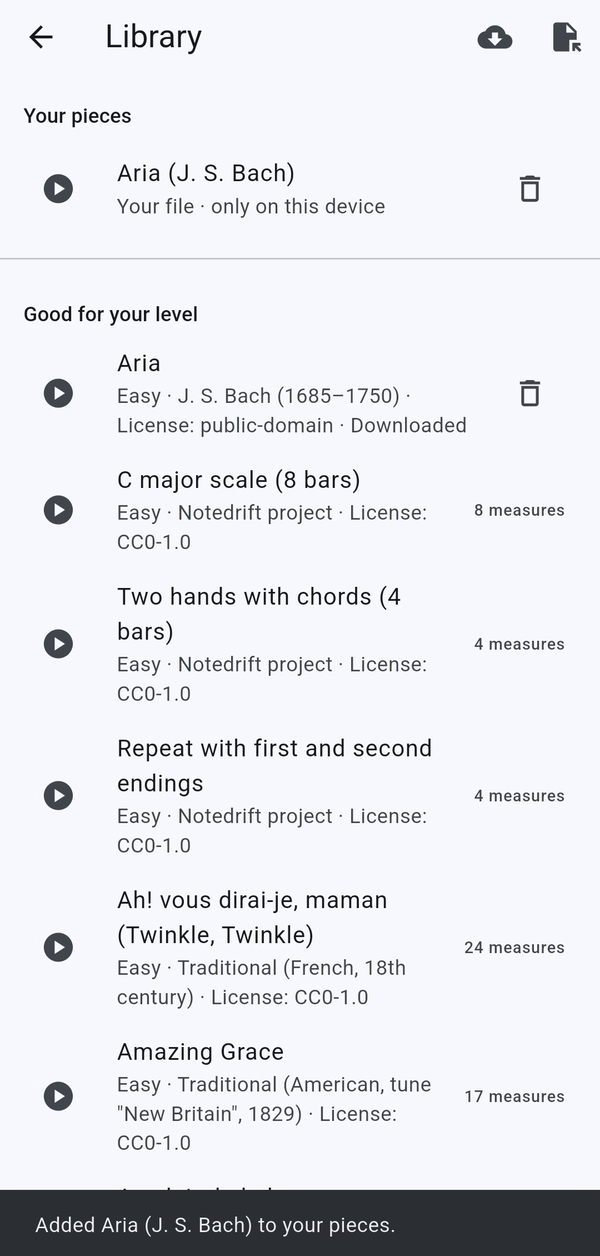
Imported files appear under Your pieces and never leave your device.
16. Notedrift Pro
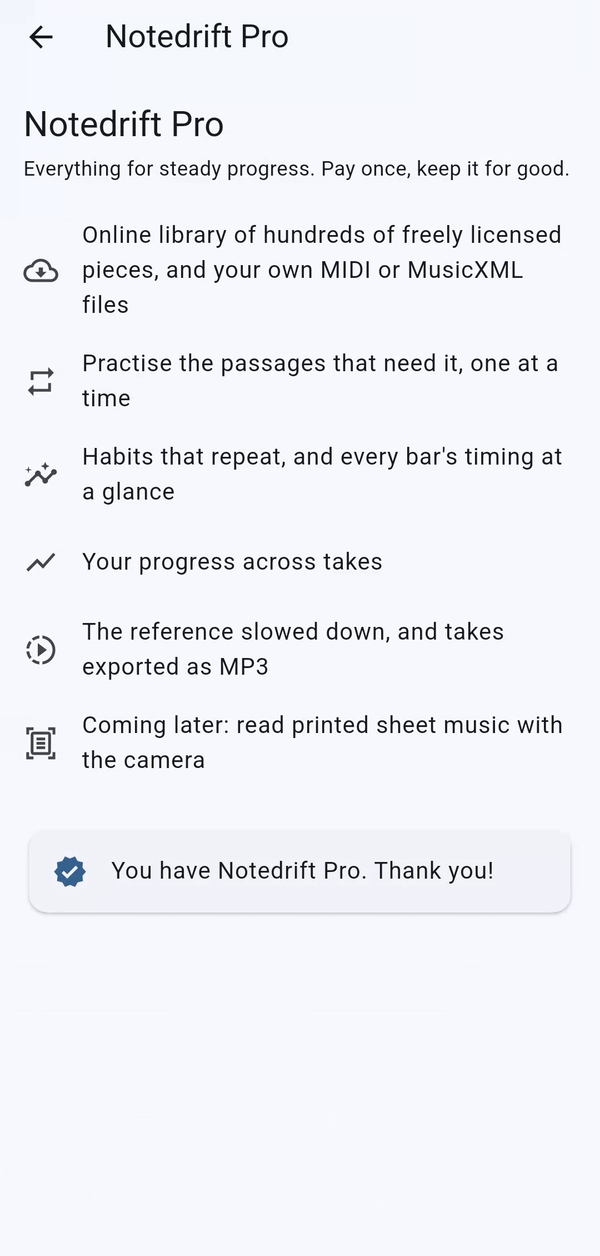
Notedrift Pro is a one-time purchase, with no subscription. It unlocks the online library, file import, passage practice, habits, progress, the slowed-down score and MP3 export. If you reinstall the app or move to a new phone, open Notedrift Pro and tap Restore purchase, signed in with the same Google account.
Tips for a good review
- With the microphone, play in a quiet room and keep the phone about 1 metre from the piano. Dense chords and a lot of sustain pedal make listening harder.
- A MIDI keyboard gives the most exact review, and it is the only way to get the Even touch score.
- Record the same piece several times: Notedrift then shows your progress, and the habits that keep coming back.
Videos
Related app
Notedrift: Find Piano Mistakes
See wrong notes and where your timing drifts, right after you play the piano.