Photo EXIF Editor Guide, Episode 3: Locations and Geotagging
Episode 3 of our video guide to Photo EXIF Editor puts photos on the map: where a location lives inside a photo, adding one by searching a place or dropping a pin, placing a photo exactly on satellite view, copying a location from one photo to many, and removing a location before a photo goes online.
On this page
This is the third episode of The complete guide to Photo EXIF Editor. After dates and times, the other question people most often want to answer about a photo is where. This episode is about the location stored inside a photo: how to read it, how to add or correct it, how to give the same location to many photos at once, and how to remove it before a photo leaves your phone.
Watch the episode above, or read on.
Where a location lives
A photo's location is a pair of GPS coordinates: a latitude and a longitude, usually with the altitude when the camera knew it, and sometimes the direction the camera was facing. Phones write them into every photo by default. Most cameras don't, unless they have built-in GPS or were paired with a phone.
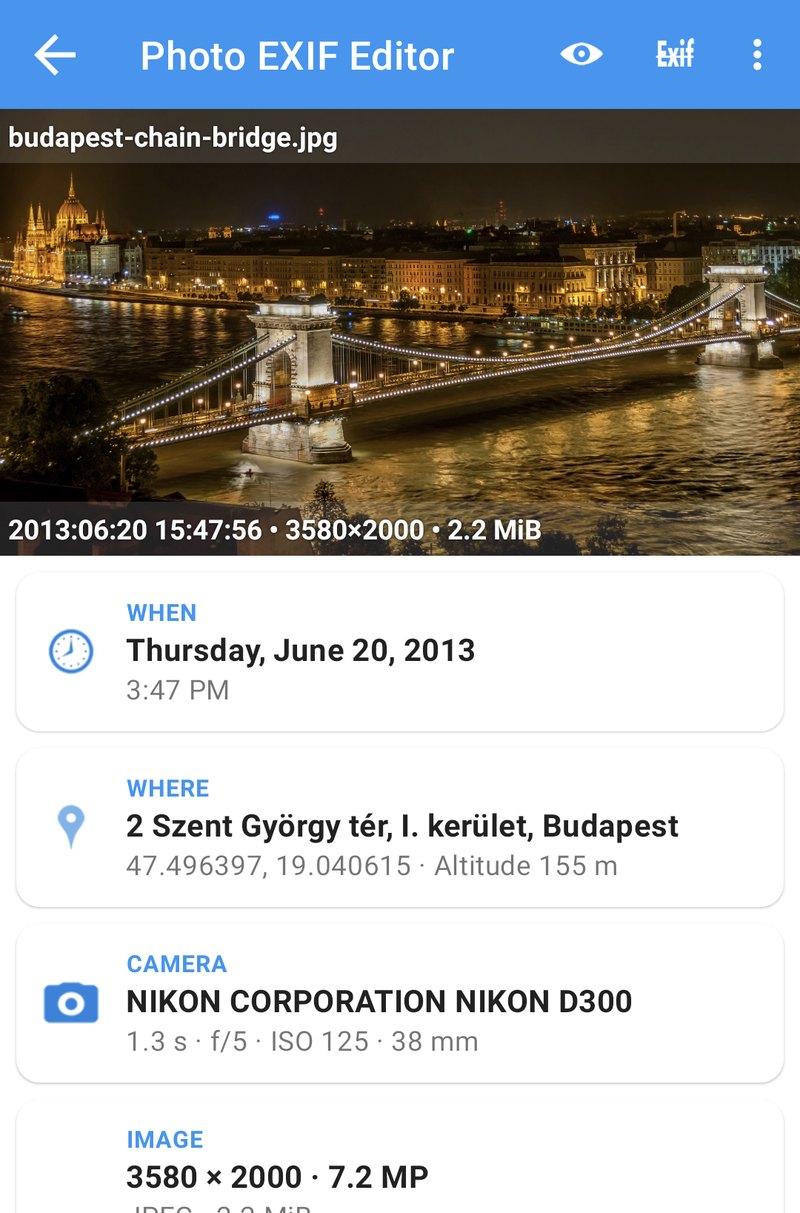
Photo EXIF Editor shows the coordinates in degrees, minutes and seconds, and looks up the address they point to, so you read a street and a town rather than two numbers. In the editor, the Where card at the top and the Geolocation field in the General section both show it; No location means the photo has none.
Why would you change it?
- The camera has no GPS. Photos from a "real" camera have no location, while the phone photos from the same day do.
- The location is wrong. A phone's position was stale when the shutter fired, and a photo from the harbour appears in the middle of the sea or in the wrong city.
- A scan. An old print has no location, and you know exactly where it was taken.
- Privacy. A photo taken at home carries your home's coordinates, often precise to the house. You'll want them gone before the photo goes online.
The location editor
Tap Geolocation in the editor (or the Where card) to open Edit location. The map shows the photo's current position with a red pin, or your region when the photo has none.
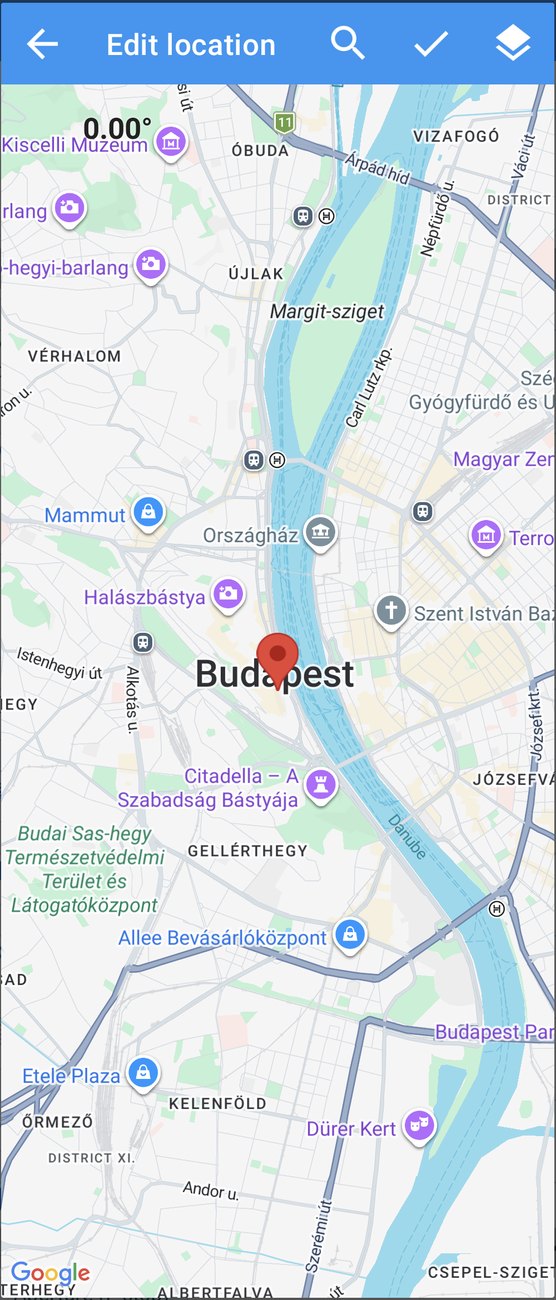
There are three ways to place the pin:
- Search. Tap the magnifying glass and type a place name, an address, or coordinates. Pick a result and the map flies there. Long press the result to use it as the photo's location, and the pin lands on the spot.
- Long press anywhere on the map to move the pin there.
- Drag the pin to a precise spot.
When you're happy, tap the check mark to confirm, then Save in the editor. The coordinates, and the address they resolve to, are now inside the photo.
Search: names, addresses and coordinates
The search box understands more than place names. An address works (221B Baker Street, London), and so do coordinates in decimal degrees, such as -27.14,-109.43. That's useful when a friend sends you the location from a map app, or when a website lists the coordinates of a viewpoint: paste them and the pin lands exactly there.
Satellite, terrain and hybrid
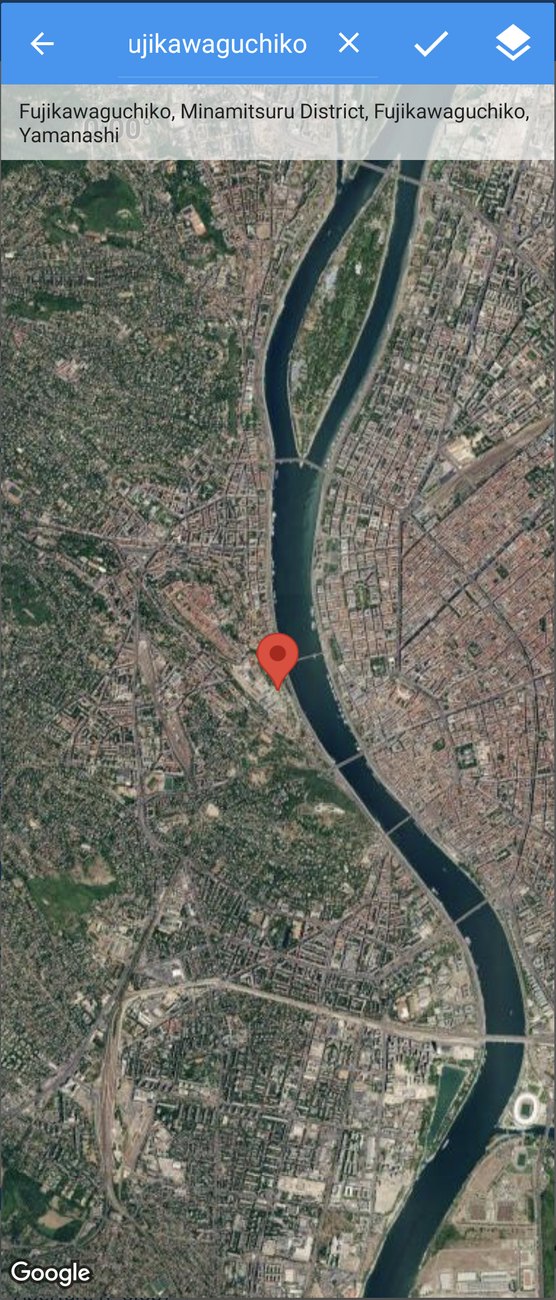
The layers button switches between the normal map, satellite, terrain and hybrid (satellite with street names). Satellite view is the one to use when you're placing a photo on a hiking trail, a beach, a particular building or a spot in a park: things that don't have an address, but that you recognise from above.
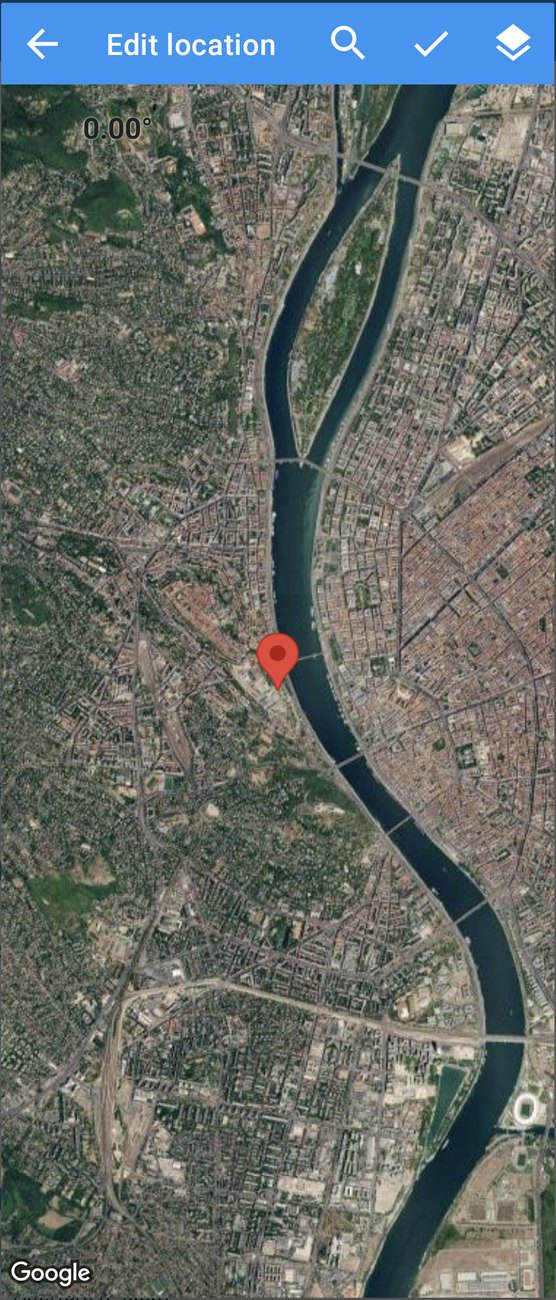
Direction
The number at the top left of the map is the direction the camera was facing, in degrees. Rotate the map with two fingers to change it. Few apps show it, but it's part of the photo's metadata, and some photo managers and mapping tools use it to draw a little cone showing what the photo looks at.
Copy a location to other photos
Often several photos should share one location: everything from one restaurant, every photo taken from a viewpoint, or photos from a camera without GPS that you took standing next to a phone that has one. Placing each photo by hand would be tedious, so the app has a quick clipboard for locations.
- In a photo that has the right location, tap the ⋮ next to Geolocation and tap the location listed under Copy.
- Give it a name you'll recognise later, like Chain Bridge, Budapest.
- Open any other photo, tap the same ⋮, and your saved locations appear under Paste. Tap one to give the photo that location.
- Save.
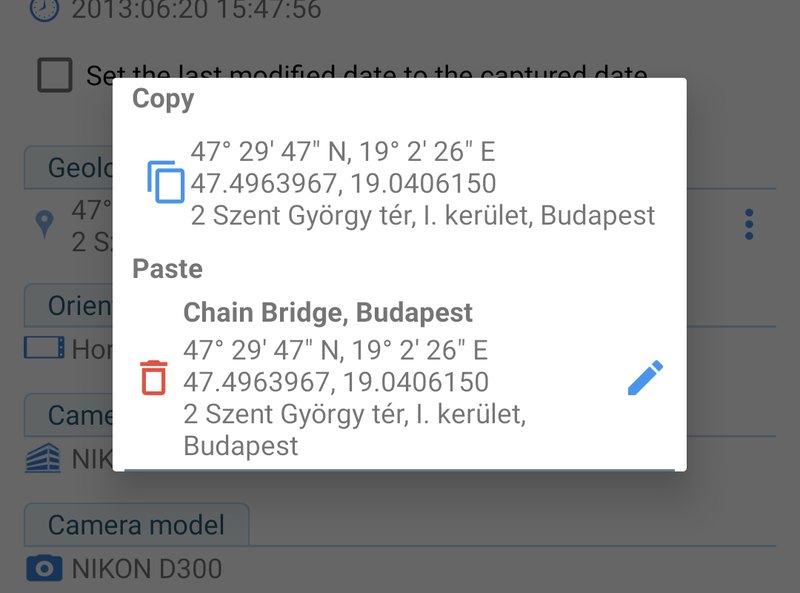
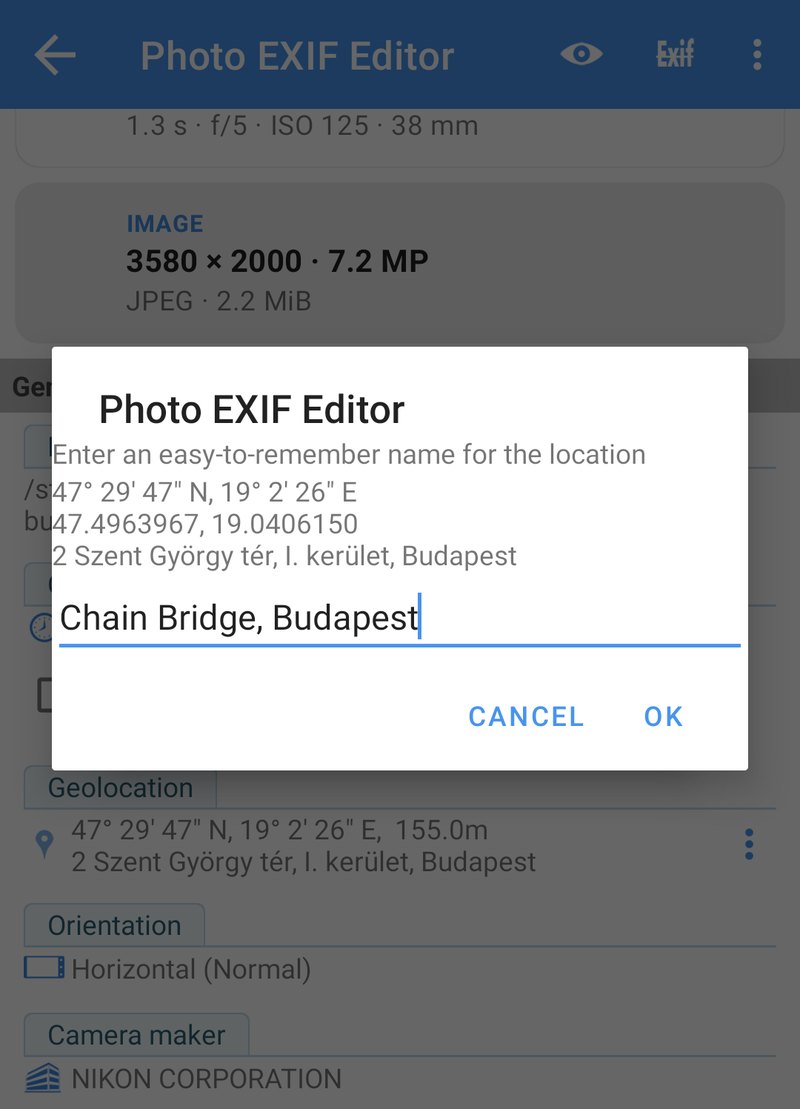
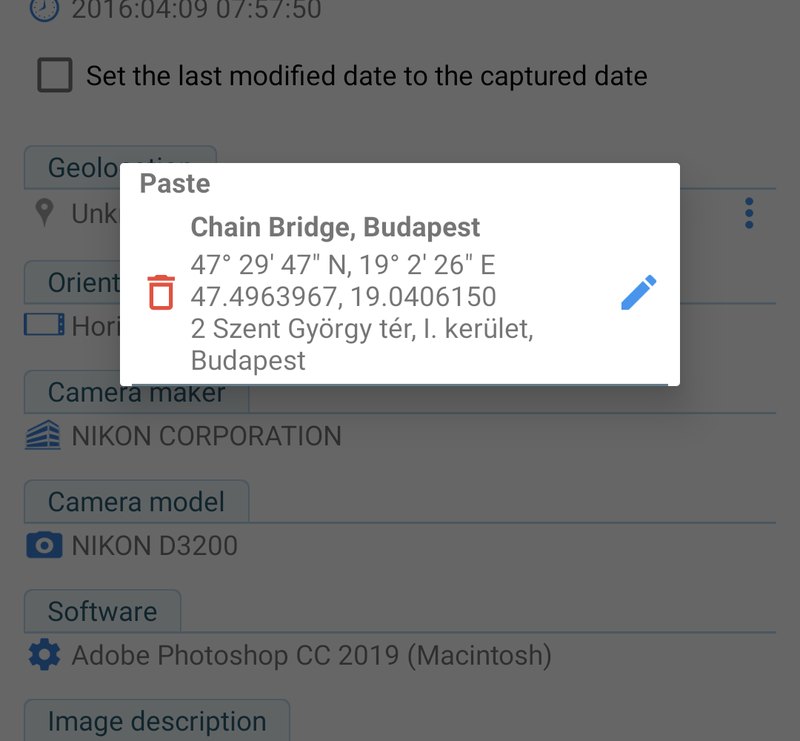
The pencil renames a saved location, and the bin deletes it. Saved locations are kept while the app is open: they're a clipboard for a session of geotagging, not a permanent address book. For a whole folder, the batch editor (Episode 4) is faster still: select the photos, tap Edit, set Geolocation once, and Save writes it into every one of them.
Remove a location
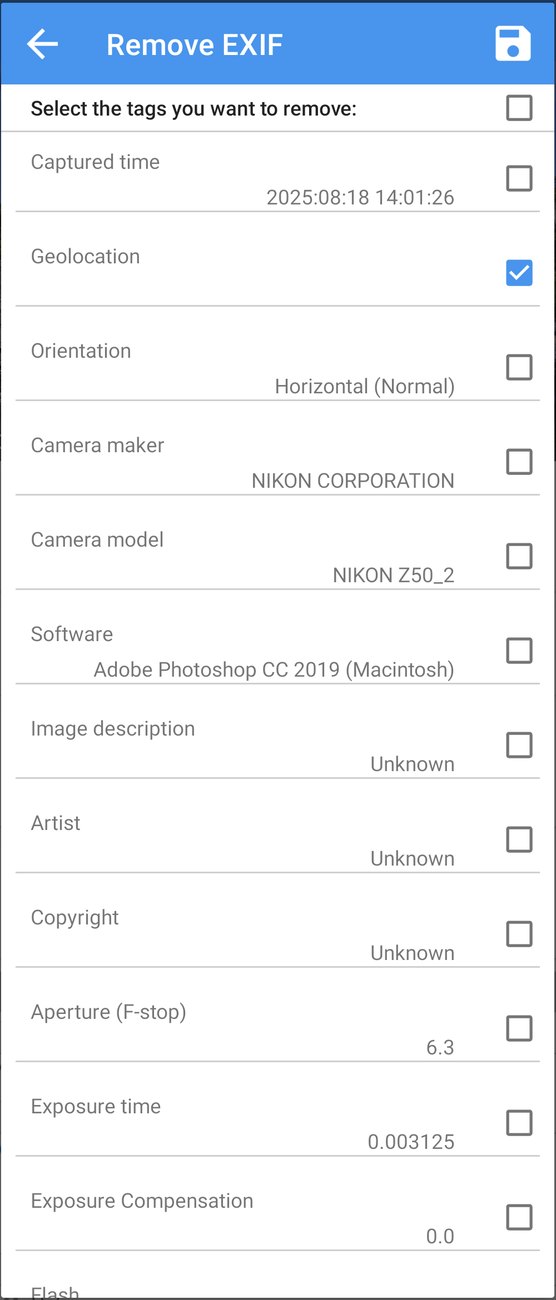
To remove the location from a photo, for example before posting a photo taken at home, tap Remove EXIF (the crossed-out Exif icon at the top of the editor), tick Geolocation, and Save. Only the location is removed; the date, the camera settings and everything else stay exactly as they were. Episode 8 covers Remove EXIF in full, including removing everything for a completely clean photo.
Good to know
- Your own position is optional. The app asks for the location permission only to show where you are on the map, which makes geotagging nearby photos quicker. Deny it and everything else works the same; we denied it while recording this series.
- Access media location. Since Android 10, apps can't read the GPS position stored in photos unless they ask for this permission. Photo EXIF Editor asks for it on first start; without it, every photo would appear to have no location.
- HEIC photos. The editor works on JPEG and PNG. Convert HEIC or AVIF photos first (Episode 8); the converter keeps their location.
- Check a whole trip on the Photo map (Episode 7). A photo in the middle of the ocean, or in the wrong city, stands out at once, and you can fix it on the spot.
- Address lookup needs a connection. The coordinates are always shown; the address is looked up online and may be missing offline or in remote areas. The coordinates are what's stored in the photo; the address is only displayed.
Recipes
Geotag photos from a camera without GPS. Sort the camera's folder by time. For each place, open one phone photo from the same spot, copy its location, then open the camera photos from that spot and paste it. For a whole day at one place, select the camera photos, tap Edit, set Geolocation once and save.
Fix a photo with the wrong location. Open it, tap Geolocation, search the right place or long press it on the map, confirm, save. If several photos from the same moment are wrong, fix one and copy its location to the others.
Date and place an old scanned photo. Set the captured time (Episode 2), then tap Geolocation and search the place. If you don't know the exact spot, the town is enough for your gallery to file it under the right place.
Prepare a photo of your home for the web. Remove EXIF, tick Geolocation, save. Consider also ticking the camera maker, model and software if you'd rather not share what you shoot with.
What's next
In Episode 4: Batch editing we edit many photos at once: select a folder, see how the editor shows fields that differ between photos, change the fields that matter in one go, and handle large batches and the permissions Android asks for.
The full series:
- Getting started
- Dates and times
- Locations and geotagging (this episode)
- Batch editing
- IPTC and the camera fields
- Templates and Copy EXIF
- The Photo map
- Privacy and the HEIC/AVIF converter
Get the app
- Photo EXIF Editor (free): https://play.google.com/store/apps/details?id=net.xnano.android.photoexifeditor
- Photo EXIF Editor Pro (no ads): https://play.google.com/store/apps/details?id=net.xnano.android.photoexifeditor.pro
The sample photos in this series are CC0 photos from Wikimedia Commons.
Videos
Related app
Photo EXIF Editor
View, edit and remove photo EXIF data and GPS location
Related posts
Photo EXIF Editor Guide, Episode 4: Batch Editing
Episode 4 of our video guide to Photo EXIF Editor is about editing many photos at once: selecting a folder, what Multiple values means, one change written to every photo, shifting a whole trip, large batches of hundreds or thousands of photos, and the permissions Android asks for along the way.
Photo EXIF Editor Guide, Episode 2: Dates and Times
Episode 2 of our video guide to Photo EXIF Editor fixes the most edited field of all: set an exact date for a scan that has none, shift a photo by an hour when the camera forgot summer time, shift a whole trip by a day in one go, keep file names and the file's own date in step, and understand the three dates hiding inside every photo.
Photo EXIF Editor Guide, Episode 1: Getting Started
The first episode of our video guide to Photo EXIF Editor: what is stored inside a photo, which permissions the app needs and why, the home screen, the File Browser and Android's photo picker, the editor section by section, your first edit, and a few habits that make editing hundreds of photos relaxed.