Photo EXIF Editor Guide, Episode 1: Getting Started
The first episode of our video guide to Photo EXIF Editor: what is stored inside a photo, which permissions the app needs and why, the home screen, the File Browser and Android's photo picker, the editor section by section, your first edit, and a few habits that make editing hundreds of photos relaxed.
On this page
This is the first episode of The complete guide to Photo EXIF Editor, a video series that walks through the app one feature at a time. Each episode is a few minutes long and comes with an article like this one, so you can watch the video, then keep the written steps and screenshots at hand while you work on your own photos.
Episode 1 is for anyone who has just installed the app, or who has only ever used one or two of its screens. By the end of it you'll know what is stored inside a photo, which permissions the app asks for and why, how to find your photos, how the editor is organised, and how to make and save your first edit without losing anything by accident.
Watch the episode above, or read on.
What's inside a photo?
Every photo your phone or camera takes carries information about itself. This information is called metadata, and most of it is stored in a format called EXIF. Some of it is stored in a second format called IPTC, which was designed for news photographers and photo libraries and is still what most desktop photo managers and stock photo sites read.
It helps to think of it as four questions a photo can answer:
- When was it taken? The date and time, down to the second, and often the time zone.
- Where was it taken? GPS coordinates, which the app turns into a street address when it can.
- How was it taken? The camera maker and model, the lens, the aperture, the shutter speed, the ISO, the focal length, whether the flash fired.
- Who took it? A description, the artist's name, a copyright notice, and in IPTC a title, keywords, a creator and a credit line.
Photo EXIF Editor lets you see all of it, and change it. Why would you want to? The date is wrong because the camera's clock was wrong. The location is missing because the camera has no GPS, or you want to remove it before you share the photo. You want your name and a copyright notice on every photo you publish. Or you simply want to know what your phone wrote into a picture before you send it to someone. Each of those is an episode of this series.
Permissions: what the app needs, and why
The first time you open Photo EXIF Editor, it shows a short screen that explains the permissions it needs before Android asks you for them. We think you should know what each one is for, so here is the list:
- Write to external storage (required). This is the photos and media permission. The app needs it to show your photos and to save your changes into them. Without it, it simply can't do its job.
- Access media location (required). Since Android 10, Android hides the GPS position stored in photos from apps unless they ask for this permission explicitly. Photo EXIF Editor needs it to show and edit locations. It doesn't track you; it reads the position that's already inside your photos.
- Manage media (Android 12 and later, optional). This lets the app change photos that were created by other apps, such as your camera app, without Android asking you to confirm every save. If you don't grant it, Android shows a confirmation dialog when you save, which works perfectly well too, just with one more tap.
- Location (optional). Only used to show your current position on the map when you geotag a photo. You can deny it; the map works fine without it. We denied it while recording this series, which is why the maps never show where our test phone is.
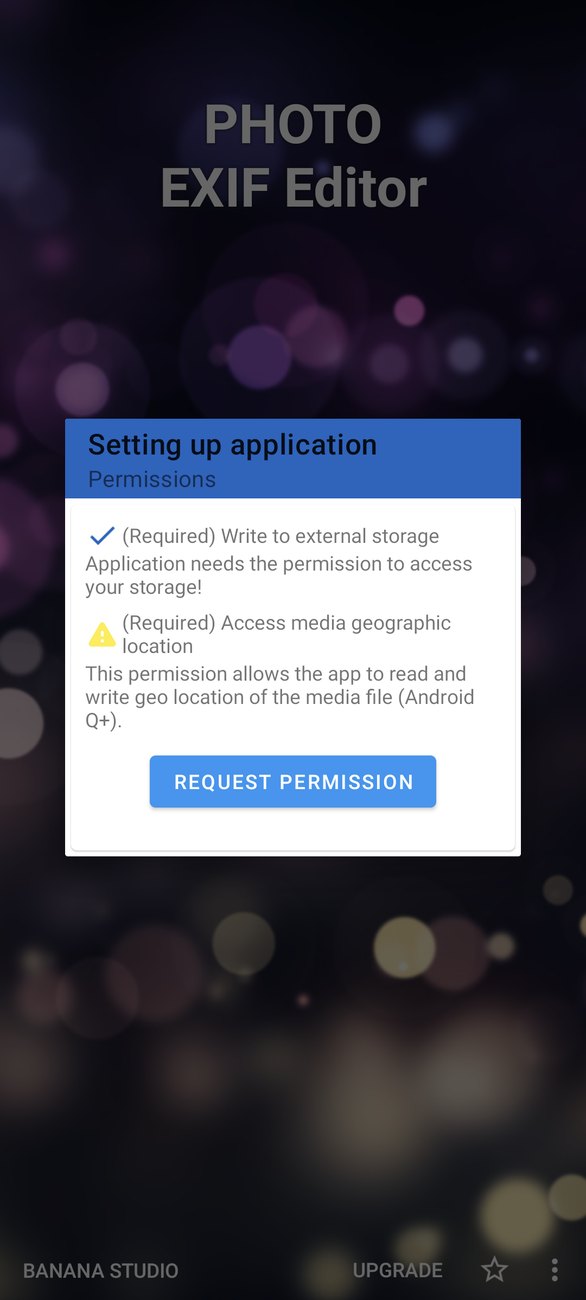
Tap Request permission and allow the first two. On Android 14 and later, Android may offer Select photos instead of full access. Photo EXIF Editor works with that limited access as well: you'll see and edit only the photos you picked, and you can widen the selection later in Android's settings.
The home screen
The home screen has four entries, and everything in the app starts from one of them:
- Photos opens Android's own photo picker. It's the quickest way to pick one or more photos from your gallery, with your albums and recent photos laid out the way you're used to.
- File Browser shows your folders and files, with thumbnails, dates and locations. It's the best way to work on a whole folder at once, and it's what we use in most of this series.
- Photo map shows your albums and places your photos on a map. It gets its own episode later in the series.
- Misc tools holds the HEIC/HEIF/AVIF to JPEG converter and Copy EXIF, which also have their own episodes.
At the bottom you'll find Upgrade in the free version, a link to rate the app, and a menu with Feedback, More apps and the Privacy policy.

A word about the two versions. Photo EXIF Editor is free and shows ads. Photo EXIF Editor Pro is the same app without ads, and the Upgrade button removes the ads from the free version too. Everything in this series works the same way in both.
Finding your photos
The File Browser
The File Browser works like a file manager made for photos. Each photo shows its thumbnail, file name, captured date, size and location. That last line is more useful than it looks: a photo with the wrong year, or one that says No location in a folder where every other photo has one, stands out at a glance, before you open anything.
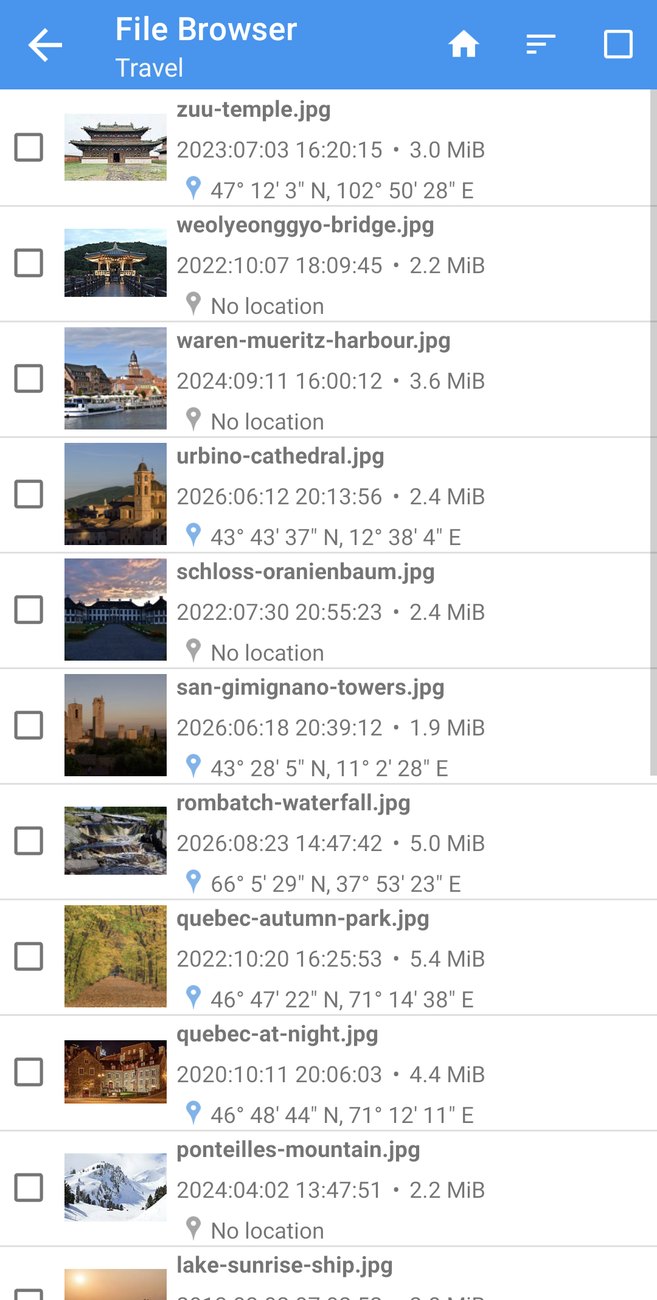
At the top of the screen:
- Home takes you back to the top of your storage.
- Sort orders the folder by name, size or time, ascending or descending. Sorting by time is the natural order for a trip; sorting by name helps when the camera numbered the files.
- Select all ticks every photo in the folder, ready for a batch edit.
Tap a photo to open it in the editor. Tick the check boxes to select several photos, then tap Edit (the pencil) to edit them all together. That's batch editing, and it has its own episode.
The File Browser and the editor work with JPEG and PNG photos. Other files and folders are listed too, so you can find your way around, but they can't be edited here. HEIC and AVIF photos go through the converter first.
The photo picker
Photos on the home screen opens Android's picker, which shows your gallery with its albums and recent photos. Pick one photo to open it in the editor, or several to edit them together. The picker is Android's, not ours, so it looks a little different from phone to phone and from one Android version to the next.
The editor
The editor is the heart of the app, and the screen you'll spend most of your time on.
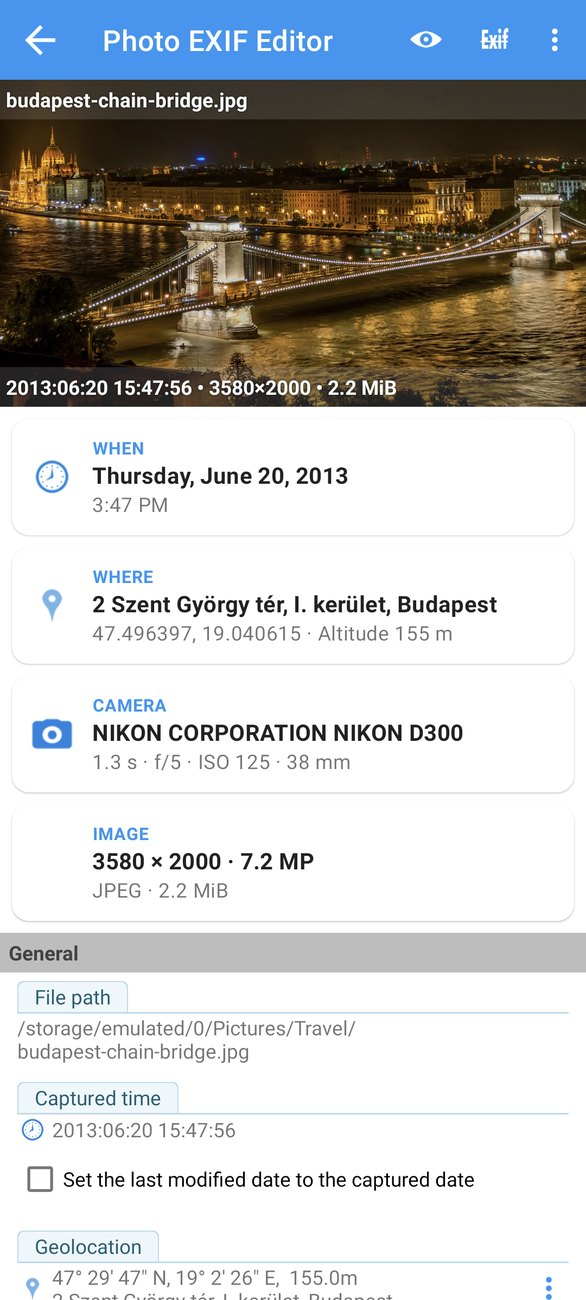
At the top you see the photo itself, with its file name, captured date, dimensions and file size. Below it, four summary cards tell the story of the shot at a glance: When it was taken, Where (with the address when it can be worked out), the Camera with its exposure settings, and the Image size and format. Tap a card to jump to the field it summarises.
Below the cards, every field inside the photo is listed, grouped into sections:
- General has the fields most people care about: the file path, the captured time, the geolocation, the orientation, the camera maker and model, the software, and the image description, artist and copyright.
- Advanced lists the camera settings: aperture, exposure time, exposure compensation, flash, focal length, ISO speed, white balance, and the comment fields Windows shows in a file's properties (XP Title, XP Comment, XP Author, XP Keywords, XP Subject).
- Professional holds the more technical fields, such as resolution and brightness.
- IPTC appears further down for JPEG photos: title, headline, description, keywords, creator, copyright notice, and the location fields.
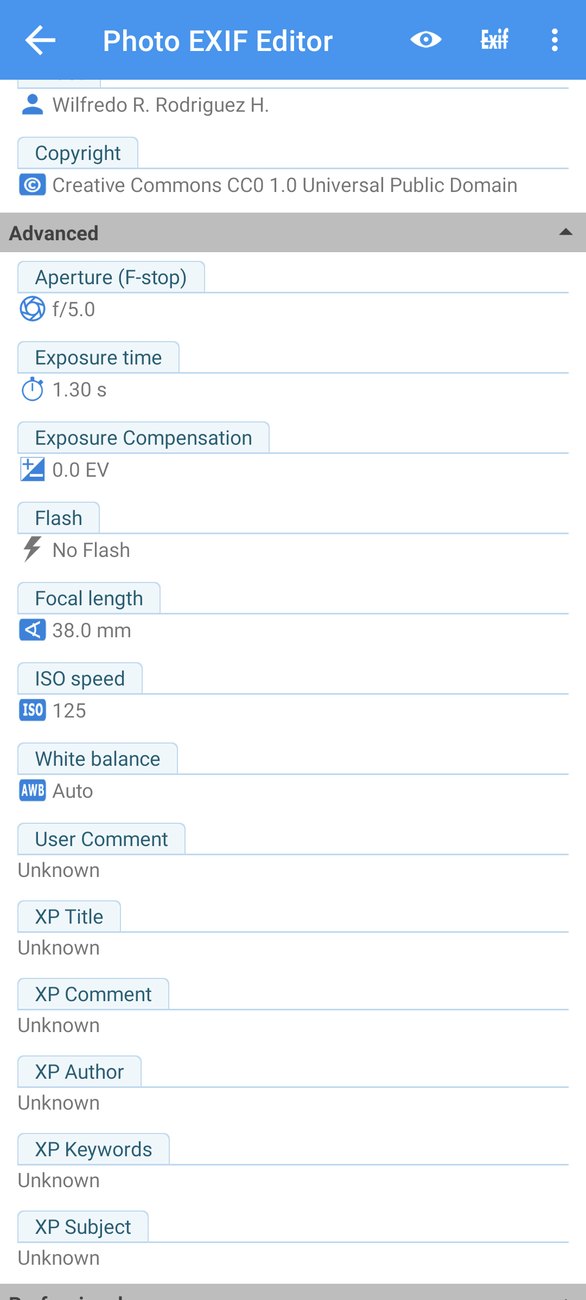
Most photos only use a few of these fields. Tap the eye button at the top to hide unknown fields and keep only the ones that have a value. Tap it again to show them all. The app remembers your choice.
Your first edit
Editing is deliberately simple. Tap any text field, type the new value and tap OK. Fields with a fixed list of values, such as Orientation or Flash, open a list to choose from. Numbers, such as the ISO speed or the focal length, open a number field.
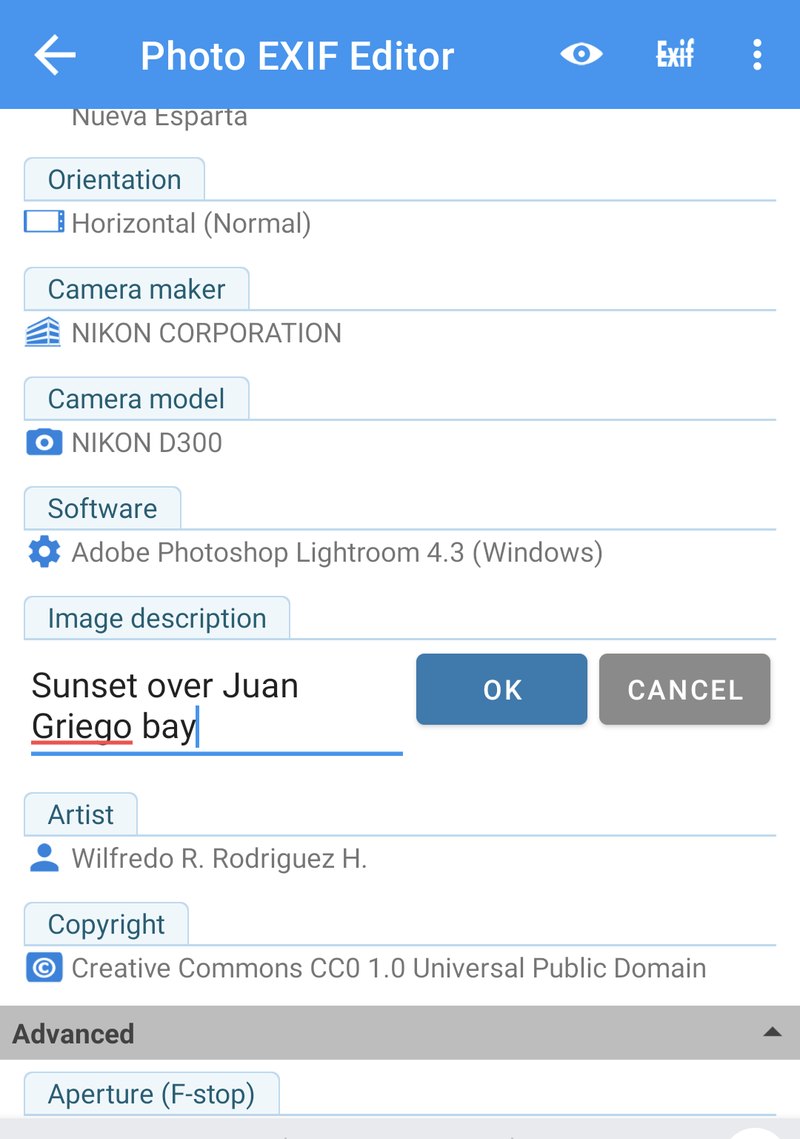
In the video we give a sunset over Juan Griego bay a description and set the artist's name. Two things are worth knowing about what happens next:
- Nothing is written to the photo until you tap Save (the disk icon). You can change as many fields as you like, go back and forth, and only the final values are written when you save.
- Only the fields you changed are different afterwards. The camera settings, the location, the IPTC data and everything else stay exactly as they were. The picture itself is never touched: the pixels are the same before and after, byte for byte.
When you save, the app shows EXIF data saved and takes you back to where you were.
Nothing is lost by accident
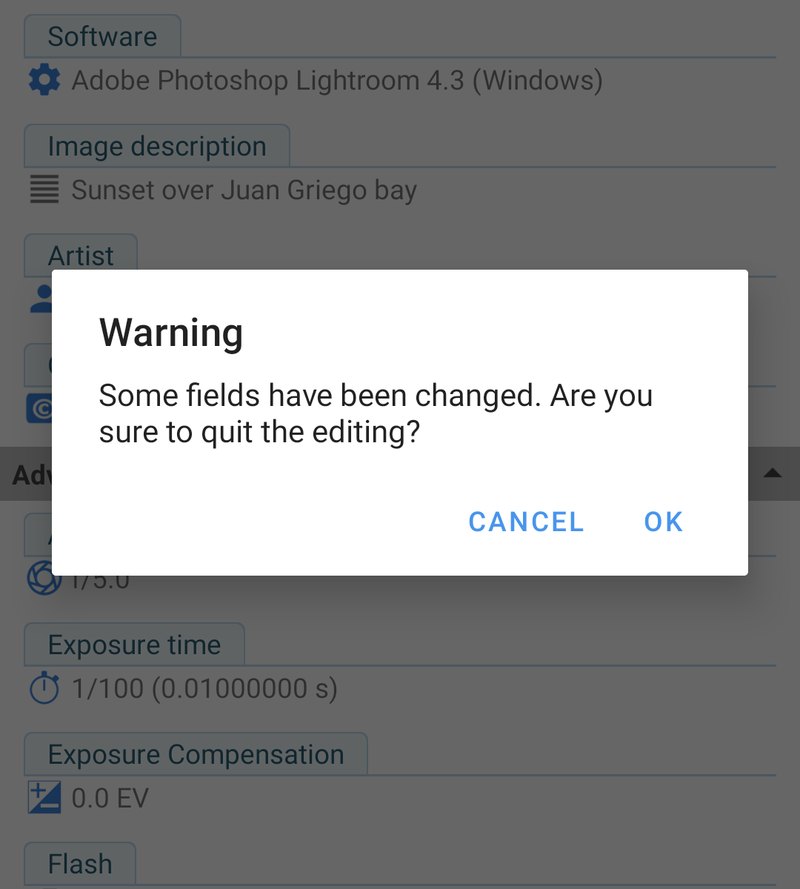
If you go back without saving, the app asks whether you really want to leave without saving. Tap Cancel to stay in the editor, then Save. Tap OK to leave and discard the changes. It's a small thing, but it means a stray swipe never throws away a minute of typing.
The editor menu
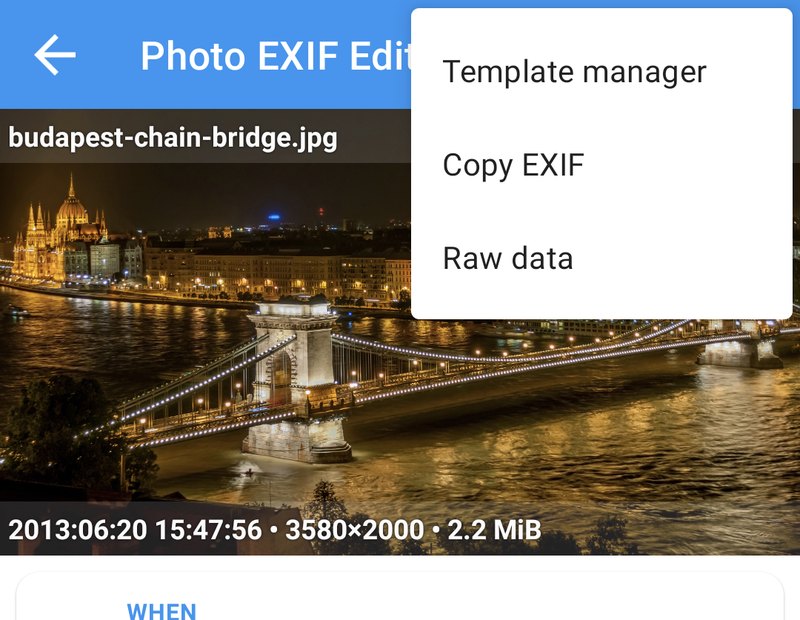
The ⋮ menu in the top-right corner of the editor has three more tools, each of which gets its own episode:
- Template manager saves the current values as a template, or applies a saved template. If you often write the same name and copyright notice, this is for you.
- Copy EXIF copies the information from this photo to other photos. Ideal after an editing app has stripped the metadata from your exports.
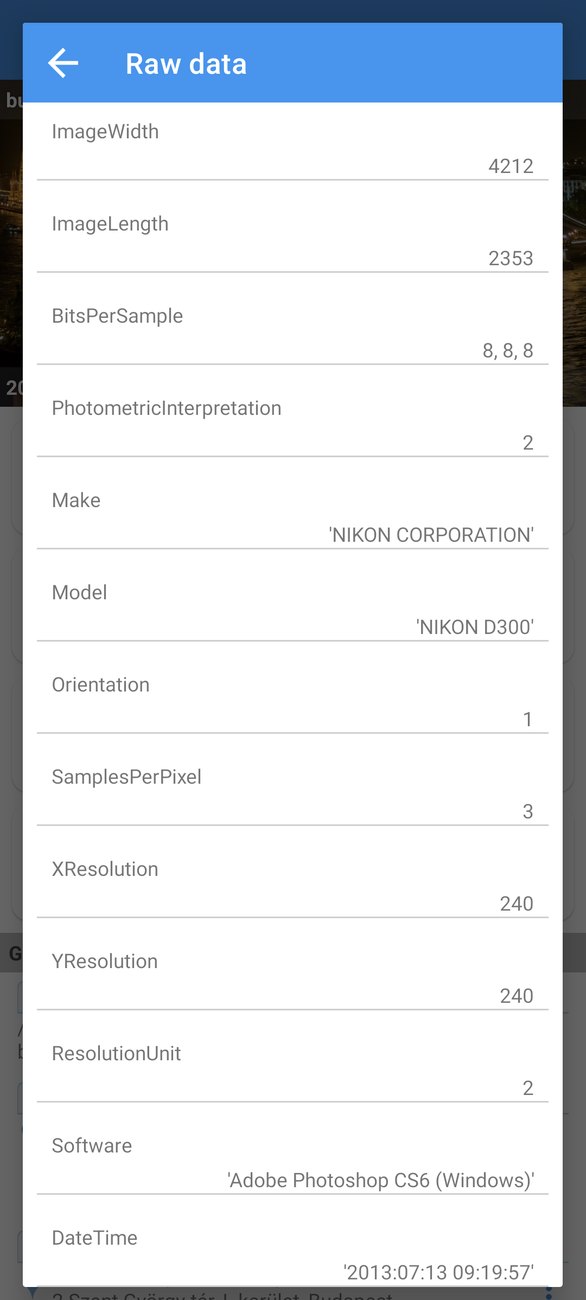
- Raw data lists every tag stored in the photo, with its official name and its exact stored value. It's the place to look when another app shows a value you can't find in the editor, or when two apps disagree about a date.
A few good habits
Editing metadata is safe, and the app never changes the picture itself. Still, a few habits make it even more relaxed, especially once you start editing hundreds of photos at once:
- Try it on one photo first. Before shifting the dates of a whole trip, shift one photo, save, and check it in your gallery app. If it looks right, do the rest.
- Keep a backup of irreplaceable photos. If your photos are backed up to a cloud service or a computer, you're already covered. If not, copy the folder before a big batch edit. There is no undo after you save.
- Work folder by folder. A folder from one trip or one event usually needs the same change, which makes batch editing simple.
- Let the app finish. Saving a large batch takes a moment per photo. You can switch apps or turn your screen off and saving keeps going; just don't uninstall the app or delete the photos while it's saving.
- Check the result in the app that matters to you. Different apps read different dates and fields. If a website or your computer is where the photos end up, check them there.
What's next
In Episode 2: Dates and times we fix the most edited field of all: set an exact date for a scan that has none, shift a photo by an hour when the camera forgot summer time, shift a whole trip by a day in one go, keep file names and the file's own date in step, and finally understand why two apps can show different dates for the same photo.
The full series:
- Getting started (this episode)
- Dates and times
- Locations and geotagging
- Batch editing
- IPTC and the camera fields
- Templates and Copy EXIF
- The Photo map
- Privacy and the HEIC/AVIF converter
Get the app
- Photo EXIF Editor (free): https://play.google.com/store/apps/details?id=net.xnano.android.photoexifeditor
- Photo EXIF Editor Pro (no ads): https://play.google.com/store/apps/details?id=net.xnano.android.photoexifeditor.pro
The sample photos in this series are CC0 photos from Wikimedia Commons. The screens were recorded on Android 11 and look the same on newer versions.
Videos
Related app
Photo EXIF Editor
View, edit and remove photo EXIF data and GPS location
Related posts
Photo EXIF Editor Guide, Episode 4: Batch Editing
Episode 4 of our video guide to Photo EXIF Editor is about editing many photos at once: selecting a folder, what Multiple values means, one change written to every photo, shifting a whole trip, large batches of hundreds or thousands of photos, and the permissions Android asks for along the way.
Photo EXIF Editor Guide, Episode 3: Locations and Geotagging
Episode 3 of our video guide to Photo EXIF Editor puts photos on the map: where a location lives inside a photo, adding one by searching a place or dropping a pin, placing a photo exactly on satellite view, copying a location from one photo to many, and removing a location before a photo goes online.
Photo EXIF Editor Guide, Episode 2: Dates and Times
Episode 2 of our video guide to Photo EXIF Editor fixes the most edited field of all: set an exact date for a scan that has none, shift a photo by an hour when the camera forgot summer time, shift a whole trip by a day in one go, keep file names and the file's own date in step, and understand the three dates hiding inside every photo.